
Creating a CRUD (Create, Read, Update, Delete) API using PHP and MySQL is a fundamental skill for web developers.
A CRUD API allows you to interact with a database to perform these essential operations, enabling you to build dynamic and data-driven web applications.
In this article, we’ll guide you through the process of creating a simple CRUD API using PHP and MySQL.
The REST API in PHP with MySQL allows you to create a web service that enables communication between your PHP application and a MySQL database. REST APIs provide a standardized way to access and manipulate data, making it easy to build dynamic and interactive web applications.
If you want to create web services or rest API in PHP MySQL to get, create, update, and delete data in JSON format from MySQL database. So for this, you have to create and use Rest API.
In this tutorial, you will learn how to create and use REST API in PHP MySQL to get/retrieve, create/add, update, and delete data from a database in PHP with JSON format.
Table of Contents
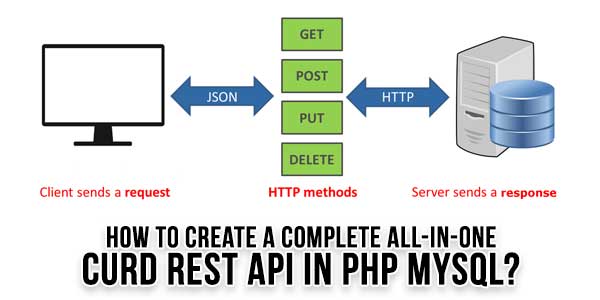
How To Create A Complete CURD REST API In PHP MySQL?
Steps to create and use rest API in PHP Mysql to retrieve, create, update, and delete data from a database in PHP JSON format:
- Step 1: Create a Database and Table
- Step 2: Connect to MySQL Database
- Step 3: Define API Endpoints
- Step 4: Test the API in POSTMAN
Before building the Rest API, you need to create a new project directory in the document root of your server. and open your project directory in a code editor.
Step 1: Create A Database And Table
First of all, you need to create a MySQL database and table to store the data for your bootstrap form data. Open your preferred MySQL management tool (e.g., phpMyAdmin) and execute the following SQL query to create a table named users and database name demo:
CREATE DATABASE Demo;

CREATE TABLE users (
  id INT(11) PRIMARY KEY AUTO_INCREMENT,
  name VARCHAR(255) NOT NULL,
  email VARCHAR(255) NOT NULL,

);
Step 2: Connect To MySQL Database
Next, you need to connect to the MySQL database using PHP. So, Create a new PHP file named db.php and add the following code:
<?php
$servername = "localhost";
$username = "your_username";
$password = "your_password";
$database = "your_database";

// Create connection
$conn = new mysqli($servername, $username, $password, $database);

// Check connection
if ($conn->connect_error) {
    die("Connection failed: " . $conn->connect_error);
}
Step 3: Define API Endpoints
Now, you need to create APIs to add, edit, update, and delete data from MySQL database. So, create a new PHP file, such as index.php, which will act as the entry point for our API, and add the following code for the respective endpoints
<?php
require_once 'db.php';
header("Content-Type: application/json");

// Retrieve user by ID
if ($_SERVER['REQUEST_METHOD'] === 'GET' && isset($_GET['id'])) {
    $id = $_GET['id'];
    $sql = "SELECT * FROM users WHERE id = $id";
    $result = $conn->query($sql);

    if ($result->num_rows > 0) {
        $row = $result->fetch_assoc();
        echo json_encode($row);
    } else {
        echo json_encode("User not found");
    }
}

// Create a new user
if ($_SERVER['REQUEST_METHOD'] === 'POST' && isset($_POST['name']) && isset($_POST['email'])) {
    $name = $_POST['name'];
    $email = $_POST['email'];
    $sql = "INSERT INTO users (name, email) VALUES ('$name', '$email')";
    $result = $conn->query($sql);

    if ($result === TRUE) {
        echo json_encode("User created successfully");
    } else {
        echo json_encode("Error creating user: " . $conn->error);
    }
}

// Update an existing user
if ($_SERVER['REQUEST_METHOD'] === 'PUT' && isset($_GET['id']) && isset($_POST['name']) && isset($_POST['email'])) {
    $id = $_GET['id'];
    $name = $_POST['name'];
    $email = $_POST['email'];
    $sql = "UPDATE users SET name='$name', email='$email' WHERE id=$id";
    $result = $conn->query($sql);

    if ($result === TRUE) {
        echo json_encode("User updated successfully");
    } else {
        echo json_encode("Error updating user: " . $conn->error);
    }
}

// Delete an existing user
if ($_SERVER['REQUEST_METHOD'] === 'DELETE' && isset($_GET['id'])) {
    $id = $_GET['id'];
    $sql = "DELETE FROM users WHERE id=$id";
    $result = $conn->query($sql);

    if ($result === TRUE) {
        echo json_encode("User deleted successfully");
    } else {
        echo json_encode("Error deleting user: " . $conn->error);
    }
}
Step 4: Test The API In POSTMAN
Send HTTP requests to the API endpoints using a tool like cURL, Postman, or a web browser extension.
Here are some example requests:
- To retrieve a user by ID: GET
http://localhost/index.php?id=1 - To create a new user: POST
http://localhost/index.phpwith form data containing name and email fields. - To update an existing user: PUT
http://localhost/index.php?id=1with form data containing name and email fields. - To delete an existing user: DELETE
http://localhost/index.php?id=1
Conclusion
That’s it! You have learned how to create a REST API in PHP with MySQL.


This tutorial on creating a complete CRUD REST API in PHP MySQL has been a real game-changer for me. As someone who’s been diving into web development, your clear and concise explanations, along with the step-by-step instructions, have helped me grasp the fundamental concepts more effectively. I especially appreciate how you’ve structured the guide, making it easy to follow along and apply the concepts in my own projects. Looking forward to exploring more of your content!
Regards,
Yogesh Shinde
Welcome here and thanks for reading our article and sharing your view. This will be very helpful to us to let us motivate to provide you with more awesome and valuable content from a different mind. Thanks again.