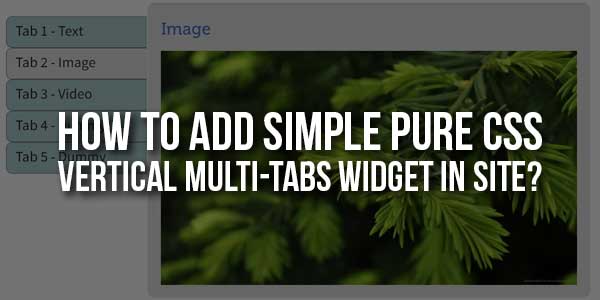
Are you looking for vertical tabs that are built up with pure CSS? if your answer is “yes!” then you are at the right place. Here I’ll explain how to create vertical tabs using HTML and CSS. But before this, I would like to introduce you to the basic use of tabs on a Web page.
Basically, the widget contains three parts – a full container, vertical navigation labels and the tab content.
- Unordered list is used for navigation with list-style as none and nth-child attribute is used to define five tabs in the vertical menu. You can modify the CSS and add more or less tabs as needed.
- Radio input type hides all inactive tab content and highlights the active tab content.
- Navigation section is defined 24% and the tab content is defined as 75% which you can change.
- You can also change the background colors and the hovering color as you need.
There are many code snippets available online or on many other blogs and websites but everyone is not able to optimize your blog or website so you need some optimized code snippets. So now checkout out the code snippet for your blog and website that will give you all features for your desired code. Now grab the ready-to-use code and paste it where you want.
Features:
- Light Weight.
- Pure CSS Code.
- Cross Browser.
- No External Files.
- Fully Customizable.
- Responsive.
How To Add Simple Pure CSS Vertical Multi-Tabs Widget In Site?
There are a few easy and understandable steps to achieve your desired functionality that we are gonna share below. Follow each step perfectly.
CSS:
<style>
#tab-container{position:relative;margin:20px auto;width:800px;border-radius:10px;box-shadow:1px 1px 5px #aaa;padding:20px;background:#fff}
input[type=radio]{display:none}
label{cursor:pointer;padding-left:20px;line-height:2}
nav{position:relative;display:inline-block;width:24%}
nav ul{list-style:none;margin:20px 0 0;padding:0}
nav ul li{position:relative;height:50px;font-size:20px;padding-top:10px;font-weight:700;line-height:30px;border-style:solid;border-width:1px;border-color:gray transparent gray gray;border-radius:10px 0 0 10px;background:#9CC}
nav ul li:hover{background:#efefef;z-index:1;color:#323232}
nav ul li:nth-child(1):hover::before{border-color:#e1e1e1}
nav ul li:nth-child(1)::before{position:absolute;border-style:solid;border-width:5px;border-color:#aaa;top:-10px;right:-1px}
nav ul li:nth-child(1)::after{position:absolute;border-style:solid;border-width:5px;border-color:#fff;top:-11px;right:0;border-radius:0 0 10px 0;box-shadow:1px 1px 0 gray}
nav ul li:nth-child(5):hover::before{border-color:#e1e1e1}
nav ul li:nth-child(5)::before{position:absolute;border-style:solid;border-width:5px;border-color:#aaa;bottom:-10px;right:-1px}
nav ul li:nth-child(5)::after{position:absolute;border-style:solid;border-width:5px;border-color:#fff;bottom:-11px;right:0;border-radius:0 10px 0 0;box-shadow:1px -1px 0 gray}
#tab-content{position:relative;display:inline-block;background:#e1e1e1;vertical-align:top;border-radius:10px;width:75%;box-shadow:0 -1px 4px #aaa}
#tab-content p{padding:15px;font-size:20px;line-height:30px}
#tab-content .div{position:relative;display:none;padding:20px}
#tab1:checked~ #tab-content .div:nth-child(1),#tab2:checked~ #tab-content .div:nth-child(2),#tab3:checked~ #tab-content .div:nth-child(3),#tab4:checked~ #tab-content .div:nth-child(4),#tab5:checked~ #tab-content .div:nth-child(5){display:inline-block}
#tab1:checked~ nav ul li:nth-child(1),#tab2:checked~ nav ul li:nth-child(2),#tab3:checked~ nav ul li:nth-child(3),#tab4:checked~ nav ul li:nth-child(4),#tab5:checked~ nav ul li:nth-child(5){background:#e1e1e1;z-index:1}
#tab1:checked~ nav ul li:nth-child(1)::before,#tab2:checked~ nav ul li:nth-child(2)::before,#tab3:checked~ nav ul li:nth-child(3)::before,#tab4:checked~ nav ul li:nth-child(4)::before,#tab5:checked~ nav ul li:nth-child(5)::before{border-color:#e1e1e1}
</style>
HTML:
<div id="tab-container"> <!-- Start of Navigation Labels --> <input type="radio" name="check" id="tab1" checked=checked> <input type="radio" name="check" id="tab2"> <input type="radio" name="check" id="tab3"> <input type="radio" name="check" id="tab4"> <input type="radio" name="check" id="tab5"> <nav> <ul> <li><label for="tab1">Tab 1 - Text</label></li> <li><label for="tab2">Tab 2 - Image</label></li> <li><label for="tab3">Tab 3 - Video</label></li> <li><label for="tab4">Tab 4 - Dummy</label></li> <li><label for="tab5">Tab 5 - Dummy</label></li> </ul> </nav> <!-- Start of Tab Content --> <div id="tab-content"> <!-- Content for 1 Tab --> <div class="div"> <h1>Text Content</h1> <p>Lorem ipsum dolor sit amet, consectetur adipiscing elit, sed do eiusmod tempor incididunt ut labore et dolore magna aliqua. Ut enim ad minim veniam, quis nostrud exercitation ullamco laboris nisi ut aliquip ex ea commodo consequat.</p> <p>Lorem ipsum dolor sit amet, consectetur adipiscing elit, sed do eiusmod tempor incididunt ut labore et dolore magna aliqua. Ut enim ad minim veniam, quis nostrud exercitation ullamco laboris nisi ut aliquip ex ea commodo consequat.</p> </div> <!-- Content for 2 Tab --> <div class="div"> <h1>Image</h1> <img src="https://img.webnots.com/2015/11/parallax1.jpg" width="570" height="400"> </div> <!-- Content for 3 Tab --> <div class="div"> <h1>HTML5 Video</h1> <video width="570" height="400" controls autoplay> <source src="https://img.webnots.com/2015/06/Slider-Video.mp4" type="video/mp4"> </video> </div> <!-- Content for 4 Tab --> <div class="div"> <h1>TAB 4</h1> <p>Lorem ipsum dolor sit amet, consectetur adipiscing elit, sed do eiusmod tempor incididunt ut labore et dolore magna aliqua. Ut enim ad minim veniam, quis nostrud exercitation ullamco laboris nisi ut aliquip ex ea commodo consequat.</p> <p>Lorem ipsum dolor sit amet, consectetur adipiscing elit, sed do eiusmod tempor incididunt ut labore et dolore magna aliqua. Ut enim ad minim veniam, quis nostrud exercitation ullamco laboris nisi ut aliquip ex ea commodo consequat.</p> </div> <!-- Content for 5 Tab --> <div class="div"> <h1>TAB 5</h1> <p>Lorem ipsum dolor sit amet, consectetur adipiscing elit, sed do eiusmod tempor incididunt ut labore et dolore magna aliqua. Ut enim ad minim veniam, quis nostrud exercitation ullamco laboris nisi ut aliquip ex ea commodo consequat.</p> <p>Lorem ipsum dolor sit amet, consectetur adipiscing elit, sed do eiusmod tempor incididunt ut labore et dolore magna aliqua. Ut enim ad minim veniam, quis nostrud exercitation ullamco laboris nisi ut aliquip ex ea commodo consequat.</p> </div> </div> </div>
Customization:
No need to customize it. Just copy-paste. Rest edit the code as per comments and need. Remember to add JavaScript after HTML code.
Troubleshooting the Errors:
Do it with concentration and patience. Check your all steps and again and all codes or scripts. If you find any error you can contact us anytime via comment or better via email, We are always here to help you.
Final Words:
That’s all we have. We hope that you liked this article. If you have any problem with this code in your template then feel free to contact us with a full explanation of your problem. We will reply to you as time allows us If you have any doubts or problems please comment below. We are happy to help you! If you liked this article, Don’t forget to share this with your friends so they can also take benefit from it and leave.


Be the first to write a comment.