
As is well known, Mac OS has a smaller market share than Windows. As a result, MS Outlook is preferred by most users. The functionality and administration offered to users by these two email clients are distinct. The file format used by Apple Mail is MBOX, as opposed to MS Outlook PST. Users can need to export Apple Mail to PST at times. Therefore, to complete the needed work, a conversion is required.
The most widely used email service that comes pre-installed on MacOS is Apple Mail. In addition, it supports several email protocols, including SMTP and IMAP, and offers an additional method of managing email data, including contacts, calendars, and more. Conversely, pros are said to find that exporting an Apple Mail inbox to Outlook is the ideal approach.
Table of Contents
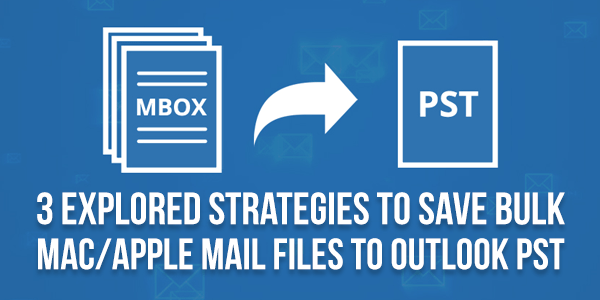
Three Useful Ways To Export Apple Mail To A PST File:
We’ll go into more detail about a few of the most recent ways to convert Apple Mail MBOX to PST below. Both expert and handbook methods for transferring Mac Mail to Microsoft Outlook are available. Now, let’s go conventional to the idea.
#1: Use The Apple Mail To PST Converter For Mac To Convert Mac Mail To PST
For Mac users, Mailvita Apple Mail to Outlook PST Converter Software offers an accurate method to convert an infinite number of MBOX mailboxes into PST format. This method works well for converting Apple Mail to PST in bulk. The user will see significant time and effort savings with the bulk conversion feature. The tool’s user interface is easy to use and provides users with guidance on how to complete procedures efficiently. During the backup procedure, no data is lost. Furthermore, the user can locate the email files more readily because the folder hierarchy is preserved even after the transfer is finished.
Step 1: Procedure For Exporting Apple Mail To PST
- The Mailvita Apple Mail to PST Converter Tool must first be downloaded and launched.
- Enter your login information now, then select Sign In.
- After selecting the files and folders, press the next button.
- From the drop-down menu, select the PST file format.
- Next, select the PC location by clicking on Path to Save.
- The conversion procedure can be started by clicking the Convert button.
With a few clicks after using the previously described approach, you can export Apple Mail to PST. In addition, the manual approach is an option if you possess technical know-how. Below is a list of the techniques and their steps:
#2: Create An Outlook PST From Apple Mail, Making Use Of IMAP
Here, we go over how to export Mac Mail to PST manually. As a result, users must first register for a new IMAP account. Let’s talk about the steps now:
- Set up the new IMAP account in Apple Mail first, and then in Microsoft Outlook.
- Next, pick up the emails and transfer them to the IMAP account that has been set up.
- Because you have set up the same account in Outlook, Apple Mail is immediately accessed by Microsoft Outlook through synchronization.

#3: Handily Convert Apple Mail MBOX To PST
The MBOX file format must first be extracted from Apple Mail. It adheres to the straightforward process listed below:
- First, export the Mac Mail MBOX file.
- Open your Apple Mail email account and log in.
- Choose the mailbox folder that has to be exported in the format of .mbox files.
- In the menu bar, select Mailbox and then the Export Mailbox option.
- Select the file location by browsing and saving the Mac Mail MBOX data.
- Subsequently, press the Select button.
NOTE: As you have seen, doing it manually might lead to several issues. The probability of data loss is high. Therefore, if you want to do a simple conversion, you can also utilize the MBOX to PST Converter for Mac. Furthermore, there are no difficulties to be encountered during the process.
Step 2: Save Emails From MBOX As EML Files
You can quickly convert your MBOX emails to EML files! The steps for Thunderbird are described in full below:
- Start by launching the MBOX email client. Right-click on a folder and choose ‘New Folder’.
- After naming it, select “Create Folder.”
- After that, pick the EML messages you want to transfer and put them in the newly created folder.
- Select all of the emails and select Save As once they have been moved. You can designate any place for them to be saved in EML format.
Step 3: Put Emails In An External Folder For Storage
With the aid of an add-on, exporting many emails from several folders to an external folder is simple!
- Navigate to the procedure for installing software and choose Install.
- Restart Thunderbird after the add-on has been installed.
- Reopen Thunderbird, choose a folder, and execute a right-click on it.
- Select ImportExportTools NG >> Export all messages in the folder >> EML format from the provided menu.
- Finally, save the EML file to the destination location that you have chosen.
Step 4: Open Outlook And Drag And Drop The EML Files
- Simply follow these easy steps to access your EML emails in Microsoft Outlook:
- Access the folder containing your stored EML emails.
- Select all of the emails now, and then just drag and drop them into any Outlook folder.
Step 5: Create PST Files From Exported Emails.
- Open a file in Outlook > Open & Export > Import/Export.
- Click Next after selecting Export to a file in the Import/Export wizard.
- Pick Outlook Data File (.pst) after that, then press Next.
- Prefer the folder containing the EML files and press the Next button.
- Now that the PST file has been produced, input its destination location, choose your preferred choice, click Finish, and you’re done.
- The selected location is where a new PST file is produced.
Note: You have the option to password-protect the freshly generated PST file if you so desire.
The chosen Apple Mail mailbox data is finally successfully exported to the chosen destination. Exporting these MBOX files to any Windows PC via an external drive is simple.
In Conclusion:
In keeping with the chat above, we have spoken about how to export Apple Mail to PST. The manual methods are more complicated and prone to mistakes. Thus, for the unwavering and hassle-free conversion of Apple Mail to Outlook PST, employ the aforementioned program. Additionally, this program has a simple and intuitive user interface and features with complex functions. Which one a user chooses is up to them.
 About the Author:
Hello, I an Antonio Bill work in the Mailvita Solution. The company provides various email conversion, backup, and Outlook Management Software. Use Our latest solution that name is Mailvita Apple Mail to PST Converter for Mac.


As we transition into the era of Web 3.0, the role of development companies becomes increasingly vital in shaping the future of the decentralized web. By harnessing the power of blockchain technology and embracing principles of decentralization, Web 3.0 development company is driving innovation, fostering trust, and democratizing access to digital services and resources. As the internet continues to evolve, these companies will play a pivotal role in shaping a more inclusive, secure, and transparent digital ecosystem for generations to come.
Welcome here and thanks for reading our article and sharing your view. This will be very helpful to us to let us motivate to provide you with more awesome and valuable content from a different mind. Thanks again.
I wanted to take a moment to express my heartfelt gratitude for the incredible content you’ve been consistently sharing on your blog. Your dedication to providing unique and informative articles is truly commendable.
Every time I visit your blog, I’m amazed by the depth of knowledge and the fresh perspectives you offer on various topics. Your ability to delve into complex subjects and present them in a clear and engaging manner is truly impressive.
Thank you for continuously enriching my understanding and broadening my horizons with your content. Your passion for sharing valuable information shines through in every post, and I feel fortunate to be able to learn from you.
Please know that your efforts are greatly appreciated, and I look forward to continuing to follow your blog and gain insights from your expertise.
Welcome here and thanks for reading our article and sharing your view. This will be very helpful to us to let us motivate to provide you with more awesome and valuable content from a different mind. Thanks again.
thanks you for continuously enriching my understanding and broadening my horizons with your content. Your passion for sharing valuable information shines through in every post, and I feel fortunate to be able to learn from you. keep it
Please know that your efforts are greatly appreciated, and I look forward to continuing to follow your blog and gain insights from your expertise.
Welcome here and thanks for reading our article and sharing your view. This will be very helpful to us to let us motivate to provide you with more awesome and valuable content from a different mind. Thanks again.