

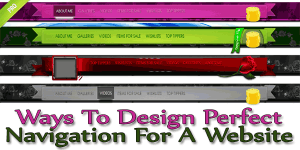
In previous article i post some article about it but with JQuery Plugin as you can read these on Simple And Stylish J-Query Multi-Tab Widget For Blog & Website And Multi Tabs Data Container In For Website And Blogger But now it’s time to rock with CSS.A navigation or menu bar is a bar made up of tabs. “Behind” each of those tabs is a link -to a post page, a static page, a label page, to another website etc. Making navigation tabs is not that difficult. They are basically links with some styling added for visual appeal. While links are arranged vertically, navigation tabs are usually arranged horizontally.
But in this tutorial i will make you learn that How To Create A Multi-Tab Widget Container With CSS Only For Blog And Website? so by this process you can add anything into it like if you are designing a single page website so you can use this coding or you also use it into (recent posts, popular posts tags etc.) in blogger.
So many people heard about jQuery, and many blogger have JQuery Multi Tab Widget also but Of course, for this application we could use jQuery UI’s tabs feature, but we’re doing it by CSS only for aving your load time so that your visitor will remain happy.
Tabbed widget boxes have become a popular way to display useful information and saving the space on your website or blog. so come on let’s do it…
Still i remember,How much struggle i faced to setup Multi Tabbed Widget on my blog. But here now i am going to show in easy steps.

Table of Contents
Features:
1.) There Is No JavaScript Or JQuery That Will Make Your Blog Too Heavy Or Many Time Smash You Template Design.
2.) Simple Coding With Easy Installation And With Quick Loading.
3.) Unlimited No Of Tabs.
4.) Simple And Stylish Design.
5.) If Your Data In These Tabs Will Increase As Compare To Height, A Scroll Bar Will Automatically Appear In That Tab Only.
How To Add In Blogspot?
1.) Go To Your www.blogger.com
2.) Open Your Desire Blog.
3.) Go To “Layout”.
4.) Click “Add A Gadget” Where You Want To Add It.
5.) Now Scroll To “HTML-JAVASCRIPT“
6.) Click “+” Icon To Add It.
7.) Now Copy The Below Code And Paste It To There.
8.) Leave The Title Empty.
9.) Click Save, Now You Are Done.
How To Add In Website?
1.) Just Go To Your HTML File.
2.) Now Copy The Below Code And Paste It Between <body> </body>.
3.) Save It, Now You Are Done.
<style>.exeideasmultitabs {list-style:none; list-style-type:none; margin:0; padding:0; height:39px}.exeideasmultitabs li {list-style:none; list-style-type:none; margin:0; padding:0; float:left}.exeideasmultitabs li {padding:5px; border: 1px solid #ff0000; border-bottom:0; background:#F8F8F8;}.exeideasmultitabs li a{color:#D44B2C; background:#F8F8F8; padding:8px 14px; display:inline-block; font-size:12px; line-height:12px; text-decoration:none; text-transform:uppercase;}.exeideasmultitabs li a:hover{color:#fff; background:#D44B2C; text-decoration:none}.scroll {width:442px; height:400px; overflow:hidden; position:absolute; clear:left; border: 1px solid #ff0000; background:#F8F8F8;}.Container div.panel {width:442px; height:400px; overflow-x:hidden;}</style><ul class='exeideasmultitabs'><li><a href="#exeideasmultitabswidget1">Tab 1</a></li>
<li><a href="#exeideasmultitabswidget2">Tab 2</a></li>
<li><a href="#exeideasmultitabswidget3">Tab 3</a></li>
<li><a href="#exeideasmultitabswidget4">Tab 4</a></li>
<li><a href="#exeideasmultitabswidget5">Tab 5</a></li>
<li><a href="#exeideasmultitabswidget6">Tab 6</a></li></ul><div class="scroll"><div class="Container"><div id="exeideasmultitabswidget1" class="panel">Your Tab 1 Text, Code, Pic And Video Here...</div><div id="exeideasmultitabswidget2" class="panel">Your Tab 2 Text, Code, Pic And Video Here...</div><div id="exeideasmultitabswidget3" class="panel">Your Tab 3 Text, Code, Pic And Video Here...</div><div id="exeideasmultitabswidget4" class="panel">Your Tab 4 Text, Code, Pic And Video Here...</div><div id="exeideasmultitabswidget5" class="panel">Your Tab 5 Text, Code, Pic And Video Here...</div><div id="exeideasmultitabswidget6" class="panel">Your Tab 6 Text, Code, Pic And Video Here...</div></div></div>
Customization:
1.) Just Change Red Text With Your Desired Data.
2.) There Is 6 Tabs In This Code, If You Want To Add More Or Remove Some Then Feel Free To Ask.
3.) You Have To Customized Some More Code In Order To Keep It Plain.


Hi,
Just dropping a few lines to thank you for all the amazing tips & tricks..I’ve used quite a few of your widgets & they all seem to work perfectly.
Keep it up!
Solo,
California
Thanks And You Are Welcome To Visit Us…
Assalam o alaikum Hassan!
Thanks for this nice feature!
can you plz also write a tutorial on adding footer with multiple columns?
You Are Welcome, Please Have A View Of Simple Table Footer Bar At Our Article 3-Column HTML Footer Bar For Blogs And Websites
wow nice article..Thanks for giving this nice tips,now try To Add a Cool Hover Subscription Box Every Post For Blogger to increase your subscriber..
Regards:
All Technology Blog
You Are Welcome To Visit Us And Leaving Your Review…
Great job! I glad that this tab view need no js and complicated code.
Welcome Here And Thanks For Liking Our Code. Be With Us To Get More Like This.