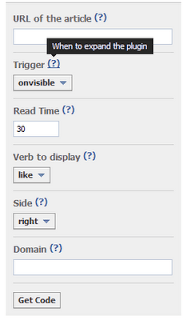
This is how the “Facebook Recommendation Bar” will look like on your site:
How to add Facebook Recommendation Bar to Blogger?
Adding this widget to your site is really a piece of cake. Just follow the steps bellow:
*1.-* First you need to create an app to get an id. So go to http://www.facebook.com/developers/createapp.php and pick a name that suits your website/blog for the Application Name.
*2.-* Select “Agree” for Facebook’s Terms, and then hit the “Create App button”.
*3.-* Select the “Web Site” tab on the left and configure the app:
– Enter your Site URL in the format: http://mydomain.com/ (make sure you include a trailing slash).
– Enter your Site Domain as: mydomain.com (drop the http://, www., and the trailing slash.
– Hit the “Save Changes” button.

-Keep your App ID on a side for future use.
*5.-* Now go to Blogger > Layout > Edit HTML and search the following code pressing Ctrl f key to make the search easy
<body>or
<body expr:class=’"loading" + data:blog.mobileClass’>
*6.-* Just bellow that code, we need to add the JavaScript SDK code which is this:
<div id='fb-root'/>
<script>
window.fbAsyncInit = function() {
FB.init({appId: 'App_ID', status: true, cookie: true, xfbml: true, oauth: true}); };
(function() {
var e = document.createElement('script');
e.type = 'text/javascript';
e.src = document.location.protocol +
'//connect.facebook.net/en_US/all.js';
e.async = true;
document.getElementById('fb-root').appendChild(e);
}());
</script>
*7.*- Now replace the *APP_ID* of the above code with the ID of the App you created in the first steps of this tutorial.
*8.-* Before to save changes, we need to add a special META tag in the head section to make it work in Blogger. So look for the code <head> and just bellow that, paste the meta code:
<meta property="og:type" content="article"/>
*9.-* Now you can save the changes of your template.
*10.-* To finish, we need to place the plugin code wherever you want it to appear on your page. Search for </body> tag and just above it, paste any of the following (just one):
<fb:recommendations-bar action='recommend' />
<fb:recommendations-bar action='like' />
If you choose the first line, it will display the “Recommend button”, but if you choose the second one, then it will display the “Like button”.
And that’s all. If you followed all the steps above, you will have the widget installed on your site successfully.
*Important:*
By default the plugin will appear on the bottom right corner of your page, if you want it on the left, then use any of the following codes instead of the previous one:
<fb:recommendations-bar action='recommend' side="left"/>
<fb:recommendations-bar action='like' side="left"/>
You can customise more options on the Facebook Social Plugin
Page: https://developers.facebook.com/docs/reference/plugins/recommendationsbar/
 About the Author:
 Antonella León Cotrina loves blogging and social networking. She has a site named EvolucionFacebook which provides tutorials, tricks and news about Facebook.


Great post, one of the few sites where original content is shared. I like this site!
Pc tricks and tips
Thanks…
Für die äußerst erfolgreichen Web Design.
web tasarım fiyatları
Freelance Web Tasarım
Thanks…
Not working…………
Don’t forget that this widget works on posts only, so you need to go to a post to see the widget. Regards.
Excellent Muhammad. What a great post!!! this widgets works like charm on my site.. I just tried it and it workssss!!! I thought this was only available for WordPress, but with this tutorial there’s nothing else I can say but thank you, thank you.. this widget looks amazing and goes well with my blog color 😀
Thanks…
Very nice now i try this widget. http://ameerit.blogspot.com
You Are Welcome To Visit Us…
Thank you, It is obviously helpful and working right way. compare and contrast essay
You Are Welcome…