Let’s face it: personalised products are hot. Customers love unique items, such as custom mugs with family photos, branded T-shirts with company logos, and engraved jewellery with special messages. But handling these orders often means endless email threads like: “Please attach your design,” “Did you get my file?” That format won’t work. Sound familiar?
What if customers could upload their files directly on your WooCommerce store—right when they order? There would be no back-and-forth, fewer mistakes, and happier buyers.
That’s where a WooCommerce upload file feature comes in. This guide walks you through the setup process step by step, no coding skills needed.
Table of Contents
What is a WooCommerce File Upload?
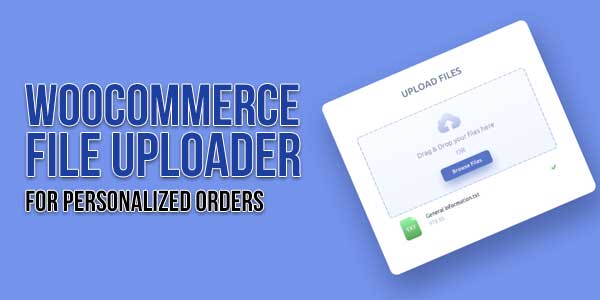
Simply put, it’s a way for customers to order custom business cards from your store. Instead of emailing their logo separately, they can attach it directly during checkout. That’s exactly what this feature does: it creates a file attachment field where customers can upload.
- Your product pages
- The shopping cart
- Or even the checkout screen
Where it shows up:
You control this! Add upload fields to specific products (like custom t-shirts) or site-wide (like a resume printing service).
Files customers can upload:
Most plugins support common types:
- Images: JPG, PNG, GIF
- Documents: PDF, DOC, TXT
- Design Files: AI, PSD, SVG (great for print shops!)
- Plus ZIP files for multiple items
Without this, customers must email files separately. That slows things down and risks mix-ups. A built-in uploader keeps everything tied to the order, smooth and professional.
Why Your Store Needs File Uploads (Especially for Custom Orders)?
- Kills Email Ping-Pong: No more “Where’s your logo?” emails. Files come with the order. Period.
- Fewer Mistakes: Customers pick the right file upfront. No, I sent last year’s logo by accident.
- Happy Customers: People love convenience. Uploading in 2 clicks feels modern and easy.
- You Save Time: Automate file collection. Focus on creating great products, not chasing attachments.
- Better Order Tracking: Files are attached directly to the WooCommerce order. Everything stays organised.
Real Examples:
- A mug store lets users upload a photo for printing
- A print shop collects PDFs for business cards
- A trophy shop gets engraving text files
- A resume service accepts DOC files from job seekers
Step-by-Step: Setting Up WooCommerce File Uploads
You’ll need a plugin since WooCommerce doesn’t include this by default. I recommend the official file upload WooCommerce plugin; it’s flexible and trusted. Here’s how to set it up:
Step 1: Install the Plugin Effortlessly
Access your Content management system dashboard. From there, go to Plugins > Add New.
Step 2: Create Your First Upload Field
Direct to WooCommerce > Settings > Products > File Upload to create your custom upload field.
Step 3: Configure Your Settings
Name your field (e.g., “Upload Your Logo”). Then set rules:
- Allowed accepted formats of files (e.g., JPG, PNG, PDF).
- Max File Size: Set limits like 10-20MB
- Required? Toggle on if you must have the file to proceed
- Upload Location: Save files to the order or server
Step 4: Add the Field to Products
Edit a product like a custom hat. In the Product Data section, go to File Upload. Select the field you created. Save.
Step 5: Test Like a Customer
Add it to your cart. You should see an upload button. Try attaching a test file. Verify it appears under WooCommerce > Orders.
Pro Tip: Add clear instructions! Use the “Description” box in settings to say: Upload a high-res PNG (under 5MB) for best results.
File Upload Best Practices: Do’s & Don’ts
✅ DO:
- Set Size Limits: Prevent huge files that crash your server. 5-25MB is safe for most images/docs.
- List Accepted Formats: State allowed types, for example, only JPG, PNG, or PDF files.
- Provide Examples: Show ideal uploads, like using a white background PNG for mugs
- Test Mobile Usability: Verify buttons work easily on phones
- Confirm Successful Uploads: Display messages like file uploaded.
❌ DON’T:
- Allow unlimited file types (security risk!).
- Skip testing with real users.
- Forget error messages (tell users why a file failed).
- Use vague labels like Choose File – say upload your photo (JPG/PNG).
Top Uses for WooCommerce File Upload (Steal These Ideas)
- Apparel Branding: Let restaurants upload logos for staff uniforms.
- Photo Gifts: Let customers upload personal photos directly for custom calendars or puzzles.
- Business Printing: Customer uploads print-ready files like flyers or banners.
- Resume/CV Services: Job seekers submit DOC files for professional printing.
- ID Verification: Request scans of licenses for age-restricted products.
- Artwork Proofing: Designers share PSD drafts for client approval.
- Custom Engraving: Get text files for personalised jewellery or awards.

Fixing Common Upload Problems
Issue: The File didn’t attach to my order!
→ Check file size limits. Increase if too small.
→ Ensure the right file type (e.g., no TIFFs if only JPG is allowed).
Issue: Error uploading – wait and try again later.
→ Check server storage space. Clean up old files.
→ Test with a smaller file (could be a timeout).
Issue: “Can customers delete/replace files?
→ Yes! Enable “Allow Multiple Uploads” in settings. They can remove the wrong files.
GDPR Tip: Add a checkbox: “I consent to store this file for order processing.” Delete files after fulfilment if required.
Wrapping Up: Stop Losing Custom Orders
Adding a WooCommerce upload file feature turns clunky email processes into seamless customer experiences. You get accurate files upfront, save hours on admin, and make personalised shopping effortless.
Instant Recap
- Install a plugin like WooCommerce File Upload.
- Create fields with clear rules, such as formats and sizes.
- Attach to relevant products.
- Guide users with examples.
- Test rigorously!
Ready to ditch the file chaos? Try the plugin like WooCommerce file upload.
FAQs: WooCommerce File Uploads
Q1: Can customers upload files from mobile phones?
A: Yes! The uploader works on all devices. Test buttons on small screens.
Q2: Is there a free file upload plugin?
A: Some free options exist, but they often lack support or features like conditional logic. Paid plugins offer reliability.
Q3: Where are uploaded files stored?
A: Usually in /wp-content/uploads/woocommerce_uploads/. You can also access them in the WooCommerce order details.
Q4: Can I charge extra for file uploads?
A: Yes! Add a fee under “Advanced Options” in the plugin settings. Useful for complex design work.
Q5: How do I stop spam/virus files?
A: Restrict file types (block EXE, SCR). Use security plugins like Wordfence. Never allow unrestricted uploads.
Q6: Can customers upload several files for one product?
A: Enable the ‘Allow Multiple Files’ option during field setup.

 About the Author:


Be the first to write a comment.