
Your store has great products. But customers scroll past them. No urgency. No reason to click. They don’t see what makes items special or why they should buy now instead of later.
A simple “Sale” badge changes everything. Suddenly, that product catches attention. Customer clicks. Conversion happens. The difference between visibility and invisibility is often just one badge.
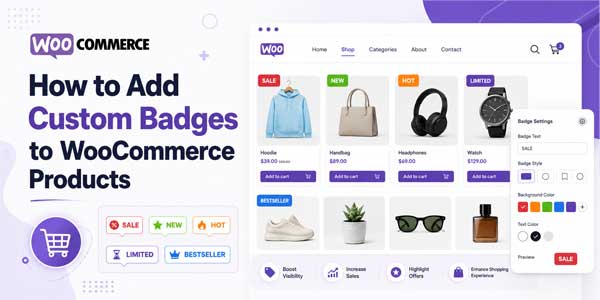
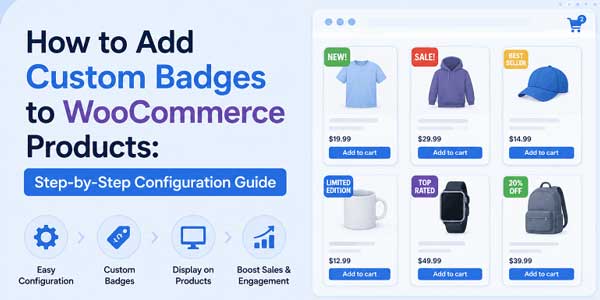
Most store owners use the default WooCommerce sale badge. Plain text. Forgettable. Doesn’t stand out. But custom WooCommerce product badges? Those grab attention. They communicate value. They create urgency. They drive real conversions.
Table of Contents
Why Your Default Badge Isn’t Enough?
The standard WooCommerce sale badge is functional but forgettable. It tells customers something is on sale, but doesn’t make them care. It doesn’t create urgency. It doesn’t stand out from competitors.
Here’s the reality. When every store shows the same generic “Sale” badge, none of them stand out. Customers see so many badges that they stop noticing them. The badge becomes invisible.
But a custom badge? One that’s designed well? One that communicates specific value? That gets noticed. That creates urgency. That drives clicks.
A product badge WooCommerce store can completely customize to change how customers perceive your products. You can show live countdown timers. Display exact discount percentages. Use branded images. Create custom text. Whatever catches attention and drives action.
What Options Actually Exist?
You’ve got choices when adding badges to products.
Manual Coding:
You could hire a developer to add badges through custom code. It works, but it’s expensive. Updates require more code changes. It’s not practical for most store owners.
Basic Badge Plugins:
Some plugins let you add simple text badges. Upload one image. That’s it. No customization. No advanced features. No flexibility. They’re cheap but limited.
Comprehensive Badge Systems:
A full WooCommerce product badges solution handles everything. Multiple badge types. Dynamic pricing data. Conditional display rules. Advanced customization. This is what actually works for serious stores.
The Product Badges and Labels plugin by Extendons falls into the third category. It’s built for stores that want real control over how badges look and function.
How Custom WooCommerce Product Badges Work?
Installation is standard. Download the plugin. Upload to WordPress. Activate. Done.
Then you navigate to WooCommerce > Settings > Product Badges and Labels. Three main sections appear. General settings. Badge creation. Display rules.
In General Settings, you can hide badges on single product pages if you want. Hide them on mobile devices if needed. Keep it simple or hide specific scenarios. Your choice.
Then you create actual badges. Three types exist. Text badges. Image badges. Countdown badges.
A text badge uses a rich text editor. You write your badge content. Font. Size. Color. Bold. Italic. All standard formatting. But here’s the powerful part. Dynamic tags let you pull live product data. Use {percentage} to show discount percentage. Use {saleprice} to show the actual sale price. Use {discount} to show the discount amount. The badge updates automatically when prices change. No manual updates ever.
An image badge lets you either pick from a predefined library of professional badges or upload your own custom image. Adjust the scale using a slider. Preview changes instantly. Size it perfectly.
A countdown badge displays a live timer. Days. Hours. Minutes. Seconds. Counting down to a specific date and time. Creates real urgency. When the timer expires, the badge automatically disappears. No manual removal needed.
Setting Up Display Rules:
Creating badges is half the battle. Displaying them correctly is the other half.
Display rules control when and where badges appear. You can show a badge on all products. Or only on sale items. Or only in specific categories. Or based on price. Or based on stock status. Or combinations of multiple conditions.
You might create a rule that says: show this discount badge on all products in the Clearance category that are marked as on sale. That rule triggers automatically whenever a product matches all those conditions.
Or: show this countdown badge on all Featured Products. Create the badge once. The rule applies it automatically to every featured product.
You can schedule badges, too. Set a date range. The badge appears on specific dates. Then disappears automatically. Perfect for time-limited promotions.
You can also restrict badges to specific customer roles. Show wholesale pricing badges only to wholesale customers. Show special promotions only to members. Show exclusive discounts only to VIP customers. Regular retail customers never see these badges.
Real Setup Example:
Here’s how this actually works, start to finish.
You’re running a winter clearance sale. You want to create urgency. Two weeks only. After that, everything sells at full price.
First, you create a countdown badge. Name it “Winter Clearance Timer.” Set the end date two weeks from today. Choose red text color because urgency. Make the background darker so it stands out.
Then you create a text badge for the discount percentage. Name it “Clearance Discount.” Use the text {percentage} off to automatically show the discount. Format it nicely. Make it stand out.
Now you create two display rules.
- Rule one: Show the countdown timer badge on all products in the Winter Clearance category during the promotion dates.
- Rule two: show the discount percentage badge on all products marked as on sale in the Clearance category.
That’s it. You’ve created unlimited impact with minimal setup. Customers see countdown timers creating urgency. They see discount percentages showing value. Both badges update automatically based on your product data.
When the two weeks end, the scheduled badges disappear. No manual removal. No forgotten badges lingering. Everything is automated.
Customization Options:
Beyond basic creation, there’s serious customization depth.
Size and positioning matter. Drag badges directly on the product image in real-time. See instantly where they appear. Adjust size with sliders. Set padding and margins. Control opacity so badges don’t obscure product images.
For advanced styling, you can rotate badges in 3D space. Adjust X, Y, and Z rotation values. Create dynamic looks that grab attention. Border radius lets you round corners or create sharp edges. Your choice.
The live preview panel updates every change instantly. You see exactly how customers will see your badges before they go live. No surprises. No bad-looking badges going out.
Addressing Common Scenarios:
“We need different badges for different customer groups.”
Create the badges you need. Then create display rules with role-based restrictions. Wholesale customers see wholesale messaging. Retail customers see retail messaging. Each group sees exactly what matters to them.
“Our promotions change constantly.”
Create badges once. Reuse them across multiple rules. When you need to change promotional messaging, update one badge. The change applies everywhere it’s used. Update once, impact hundreds of products.
“We run seasonal promotions.”
Schedule badges. The badge appears on specific dates. The badge disappears automatically when the promotion ends. No manual management. No forgotten badges. Just automated precision.
“We need live pricing data in badges.”
Use dynamic pricing tags. {saleprice} shows the actual sale price. {percentage} shows the discount percentage. {discount} shows the discount amount. Data pulls automatically. Prices change in WooCommerce. Badges update instantly. No manual updates.
“Mobile customers can’t see badges clearly.”
Hide badges on mobile devices if you want. Or adjust sizing specifically for mobile. Test on actual devices. Make sure badges display correctly everywhere customers shop.
Measuring Impact:
After implementing WooCommerce product badges, track what improves.
Click-through rates on sale products typically increase. Customers notice badges. Click more frequently. Visit more product pages.
Conversion rate on promoted items usually jumps. Urgency created by countdown timers and discount displays actually converts browsers into buyers.
Average order value may increase if you’re using badges to highlight premium or bundle products. Visibility drives interest. Interest drives sales.
Return rate can decrease if badges accurately communicate product details. Customers know what they’re buying. Expectations align with reality. Fewer returns result.
Customer perception of your store improves. Professional-looking badges signal attention to detail. Customers trust stores that look professional.
Getting Started:
Start small. Create one WooCommerce product badge for your most common promotion. Set up one display rule. Test it. See how customers respond. Refine based on what works.
Then expand. Add countdown badges to create urgency. Add discount percentage badges to show value. Create role-based badges for different customer segments. Build gradually. Learn what resonates.
WooCommerce product labels and badges aren’t flashy features. They won’t impress anyone discussing store architecture. But they’re conversion multipliers. They grab attention. They create urgency. They communicate value.
That translates to more clicks. More sales. More revenue.
Your store already has great products. Custom badges just make sure customers actually notice them
 About the Author:
I’m Jeff Harrison. I’ve spent years exploring WooCommerce, mostly by testing plugins in real store environments and evaluating how they perform beyond their feature lists. I regularly work with various plugins such as the WooCommerce product badges plugin by Extendons and other extensions that help store owners improve store functionality and the customer shopping experience. My focus is usually on what a plugin actually delivers after installation, how well its features hold up in everyday use, and whether it provides lasting value for store owners. Marketing promises don’t interest me much. Instead, I aim to give practical insights that help merchants decide whether a plugin is genuinely useful for their business or likely to be forgotten after the initial setup.


Be the first to write a comment.