
You may think no one will care to dig into your laptop to find something valuable. But are you ready to show all your letters, photos and documents to your wife or kids? Even if you have no secrets, you’d better make your personal data invisible on hard drive. Whether you just wish to configure your old Mac to use it as a gift for your kids or to hide particular files on your machine there are several tricks how to do this by means of Mac OS X. I have prepared several simple tips that will help new-to-Mac users choose the needed level of protection.
Table of Contents
Options Provided by Mac OS X:
1.) Do Not Use Obvious Names:
Probably the simplest and most obvious tip that does not require any computer skills: you can name your top-secret financial files as “my granny photos 1985” and hope that nobody cares to open them. But if the information is sensitive enough, try more sophisticated options.
2.) Go To The Next Level And Turn On FileVault:
This option will require password every time someone tries to get at the content of your hard drive. Go to System Preferences → Security & Privacy → Turn on FileVault.
Note: If you enable FileVault and forget the unlocking information you will not be able to get back into the drive.
Tip: If you use OS X Yosemite, store your FileVault key in iCloud. Then use your account name and password in order to unlock the start up drive.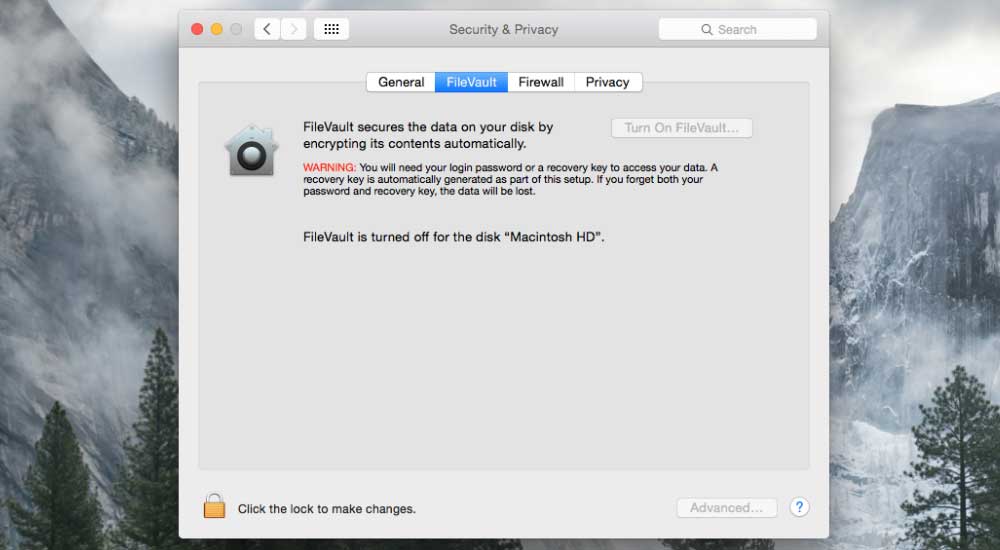
3.) Create Encrypted Disc Image:
Go to more advanced level and create encrypted disc image where you can keep all your important files protected with password:
- Open up Disk Utility: Go to Applications → Utilities → Disk Utility
- Click the New Image button, name it and choose the Save destination → Select a size for the disk image
- To make your image encrypted, choose 128-bit AES or 256-bit AES encryption
- Click the Create button
- Enter solid password and enable “Remember password (add to keychain)” to save it
- Click OK
Encrypt All Sensitive Files:
In case you share your account with someone else you’d better try some third party encryption options. According to Mac Encryption Software Review made by the TopTenReviews in 2015, there are a several criteria that you should consider before choosing encryption software:
- ability to securely encrypt files or to delete them forever (by means of encryption and shredding);
- a virtual vault;
- password meter (that helps to create stronger password);
- built in internet security features;
- technical assistance.
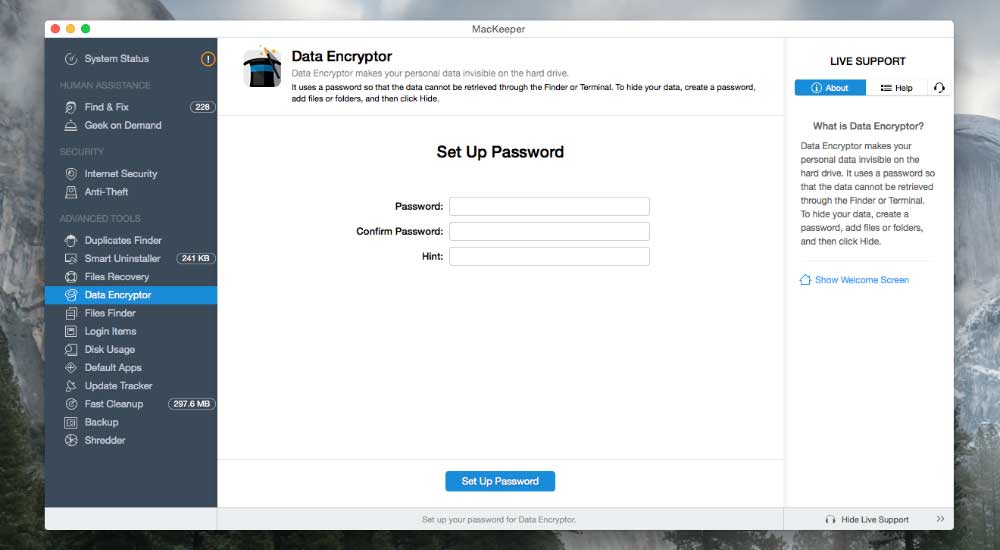
After evaluating each parameter they ranked the best encryption software for Macs available on the market today. MacKeeper, Espionage and Identity Scrubber claimed the top three spots on our side-by-side comparison. They work as lockers that protect once loaded data by AES encryption. You can choose 128 or 256 key size. I advise to choose the most advanced standard available today – 256 key size.
Configure Your Mac To Its Original State:
If you are a lucky owner of new Macbook but want to keep your old machine for your kids, or simply for sale, you should primarily erase all personal data. After backing up your content you can start cleaning your hard drive using Disk Utility. In this particular case you need to securely erase the entire disk rather than partitions.
- Open up Disk Utility: Go to Applications → Utilities → Disk Utility
- Click on the hard drive in the list (not the partition) → Choose an Erase tab
- In the Secure Erase dialog select the level of security that ranges from the “Default level” (if you do not have any sensitive files) to the “Most Secure” level.
- After being prompted click “Erase” and wait until the process ends

Tip: In case you decide to cancel the whole process, click a Skip button. This action will reformat your drive.
Depending on the protection level you need, you can configure your Mac OS X either by yourself or with third-party software. Now you can choose the best option to protect your banking information, intellectual property or private videos from prying eyes.
 About the Author:My name is Sofia Bilski. I am currently working at software company and love everything relating to technology. Previously worked at @Henkel as brand manager but decided to switch to IT world. Love music, travelling and sharing fresh ideas about software industry. I like as well writing about internet security and always keep track of security trends.


i was looking for this kind of solution from long time, thanks for solving my problem….its nice tutorial
Welcome here and thanks for liking our article. Stay with us to get more like this…
Very informative and helpful post, I was looking for the same info and visited this page of peaceful information…
Welcome here and thanks for liking our blog and article.