
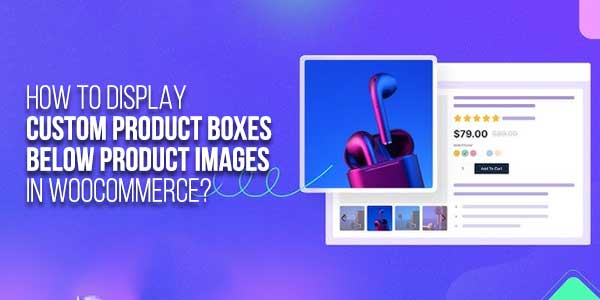
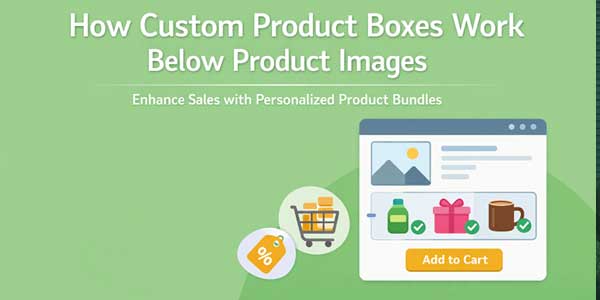
Showing product options right below the product image changes how shoppers interact with your store. Instead of scrolling or clicking around, they immediately see what they can build, choose, or customize. This is exactly where WooCommerce custom product boxes start to feel useful rather than decorative. When done properly, these boxes sit below the product image and guide customers into creating their own bundles without confusion.
This setup is commonly achieved using a WooCommerce mix-and-match approach, where customers pick items into a box directly from the product page. The goal is simple. Keep everything visible, intuitive, and connected to the product image itself so the buying decision feels easier.
Below is a complete walkthrough starting from installation, all the way to advanced box behavior and layout control. Later, we will also touch on plugin choices and why certain solutions make more sense long term.
Table of Contents
Installing and Accessing Custom Product Boxes from the Dashboard:
The first part happens entirely inside your WordPress admin area, and it does not require any manual coding, which honestly helps a lot when you want to scale this across multiple products.
Once the plugin is downloaded from your WooCommerce dashboard, the process looks like this:
- Go to Plugins inside the WordPress admin panel
- Click Add New and then Upload Plugin
- Select the zip file and click Install Now
- Activate the plugin once installation finishes
After activation, you will notice a new area inside WooCommerce settings. This is where most store owners spend their time adjusting how WooCommerce custom product boxes appear below product images.
To access the configuration:
- Navigate to WooCommerce
- Open Settings
- Click on the Custom Boxes tab
This section controls the global behavior of your boxes before you even attach them to a product.
Configuring Global Custom Box Settings:
Inside Custom Boxes General Settings, you can shape how boxes look and behave on the frontend. These settings matter because they control what appears directly under the product image.
Some key options you will work with include:
- A layout style where you choose between a detailed view showing descriptions or a compressed view for faster browsing
- View style allows list or grid layouts, depending on how many items you offer
- Add to cart button text that helps match your store tone
- Heading label to clearly explain what the box is about
- Out of stock message customization so customers are not confused
- Success message shown when a box is filled
- Form width control, which helps align boxes neatly under images
- Background color and primary color match your theme
- Price label styling
- Image placeholder for empty box slots
These settings define how the WooCommerce mix and match boxes by Extendons feel visually. When aligned correctly, they naturally sit below product images without breaking the layout or pushing content awkwardly.
Creating a Product That Displays Boxes Below Images:
Now comes the product level setup. This is where the box actually becomes visible on the product page.
To create one:
- Go to WooCommerce
- Click Products, then Add New
- Inside Product Data, change the product type to Custom Product Boxes
Once selected, a new Product Boxes tab appears. This tab controls everything customers interact with below the product image.
General Product Box Settings:
Inside the Product Boxes tab, you can enable or disable boxes per product, which helps when testing layouts.
Key settings include:
- Pricing type selection
- Fixed pricing for a set box price
- Per item price with base price
- Per item price without base price
- Sorting products by date to show new items first
- Enabling gift messages for personal touches
- Hiding out-of-stock products so boxes stay clean
These options directly affect how WooCommerce custom product boxes behave when customers start adding items.
Setting Quantity and Box Limits:
One of the most practical features is controlling how many items fit into a box. This avoids random combinations and keeps bundles intentional.
You can configure:
- Box quantity to define the total number of items allowed
- er product limits to stop customers from adding the same item repeatedly
- er-box limits are applied individually when multiple boxes are added
- Allowing partially filled boxes with minimum quantity rules
This setup works especially well for gift boxes, subscription bundles, and curated sets where flexibility matters but structure still exists.
Designing the Box Layout Under Product Images:
Design control is what makes these boxes blend naturally with your product images instead of feeling like a separate widget.
Inside Bundle Layout Design, you can:
- Override global design settings for specific products
- Choose layout styles such as compressed or detailed
- Select grid or list view styles
- Enable product descriptions when using detailed layouts
When configured properly, the box aligns visually under the product image, making the page feel intentional rather than crowded. This is where WooCommerce mix and match setups usually outperform simple bundle plugins.
Allowing Multiple Boxes Per Product
Some stores allow customers to create more than one box in a single order. This feature is useful for bulk gifting or family packs.
You can manage this by:
- Enabling add new box option
- Setting a maximum number of boxes allowed
- Restricting new boxes until minimum quantities are met
This logic prevents messy orders and keeps the checkout process clean.
Selecting Product Categories and Prefilled Items:
Choosing what appears inside the box is straightforward but powerful.
You can:
- Select individual products or entire categories
- Add prefilled items that appear by default
- Make items optional or mandatory
- Apply prefilled logic to each new box
This gives store owners control without limiting customer creativity, which is exactly what WooCommerce custom product boxes are supposed to achieve.
Highlighting Featured Products Inside the Box:
Featured items can be pinned to the top of the box to guide customer choices.
This is helpful when:
- Promoting new products
- Pushing high-margin items
- Guiding seasonal bundles
Featured placement subtly influences buying decisions without forcing anything.
Restricting Boxes by User Role:
For wholesale or membership-based stores, user role restrictions are important.
You can:
- Enable role-based access
- Select allowed user roles
- Display a custom message for restricted users
This keeps premium bundles exclusive while still visible.
Applying Discounts Inside Custom Boxes:
Discount logic adds another layer of motivation.
Available options include:
- Enabling box-level discounts
- Showing a discount widget
- Custom button text for discounts
- Fixed or percentage discounts per item
Discounts appear only when compatible pricing types are selected, which keeps pricing logic consistent.
Choosing the Right Plugin for Custom Product Boxes:
Several plugins offer mix-and-match functionality, but not all handle layout placement well.
When comparing options, look for:
- Native support for displaying boxes under product images
- Flexible pricing models
- Layout customization without code
- Multi-box support
- Role restrictions and discounts
Many plugins stop at basic bundles while advanced solutions focus on usability and structure. For stores that want scalable WooCommerce mix and match functionality without breaking product pages, a dedicated custom box solution usually performs better.
Why This Approach Works for Modern Stores?
Displaying WooCommerce custom product boxes below product images shortens the decision-making process. Customers see the product, then immediately see how they can customize it. There is no guessing and no extra navigation.
It also helps with:
- Higher engagement on product pages
- Clearer bundle value perception
- Reduced cart abandonment
- Better control over product combinations
When combined with the right plugin, the experience feels intentional rather than forced.
Final Thoughts:
Custom product boxes are no longer just a nice feature. They are becoming a core part of how stores sell bundles, kits, and curated experiences. Using a proper WooCommerce mix-and-match setup allows you to place these boxes exactly where customers expect them, which is right below the product image.
When configured thoughtfully, these boxes guide customers instead of overwhelming them. And that is usually what separates a store that converts well from one that just looks busy.
 About the Author:
I’m Jeff Harrison. I’ve been writing about WooCommerce for quite a while now, mostly by actually installing plugins and seeing how they behave inside real stores. I spend a lot of time working with tools like WooCommerce custom product boxes and similar add-ons that are meant to make customization and store management less of a headache. I usually focus on what the plugin really offers once it’s active, how pricing makes sense over time, and whether the features hold up after you start using them properly. I’m not too interested in polished marketing claims. The goal is simple: help store owners understand if a plugin will genuinely be useful for their setup or if it’s something they’ll uninstall a week later.


Great content! The article covered important points in a well-structured and easy-to-read format. I really appreciate the effort behind creating such useful information. Articles like this help readers gain knowledge quickly and effectively. Please continue sharing more content like this regularly.
Welcome here and thanks for reading our article and sharing your view. This will be very helpful to us to let us motivate to provide you with more awesome and valuable content from a different mind. Thanks again.