
Retina and high resolution displays in general are like HD TV, pretty soon everyone will have one. Your website will look really bad on a high-res display if you don’t change a few things. How bad? Zoom in to 200% on your website logo or one of your images, that’s exactly what it looks like on a Retina display (but worse because everything else like text is super crisp in comparison).
Table of Contents
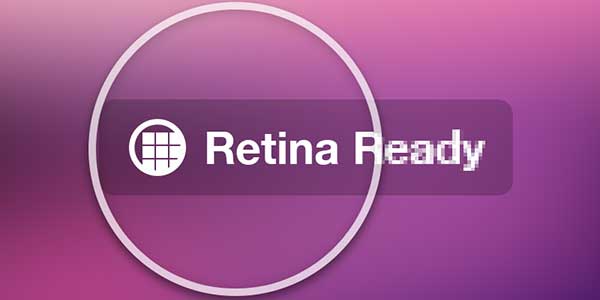
How to Retinize Your Theme? (Without A Bunch Of Coding)
A lot of people have already written about how to retinize your theme with a bunch of custom coding. Retinizing your theme basically means serving images at double the size (but the same pixel dimensions) for Retina devices. So a 100×200 image would need to be a 200×400 image, squished back down to 100×200 in the browser. (A little confusing, but keep reading and you’ll get it.)
1.) Install Retina.js:

Retina.js is a script that will make your theme about 80% Retina-ready instantly. Here’s what it does in their words:
When your users load a page, retina.js checks each image on the page to see if there is a high-resolution version of that image on your server. If a high-resolution variant exists, the script will swap in that image in-place.
What you have to do: Say you upload your site logo, and it’s called logo.png. Make a copy of the file, but double the size (in Photoshop or a similar program) and call it logo@2x.png. Upload logo@2x.png to the same folder as your logo.png file, then retina.js will automatically swap out the smaller image for the larger one on Retina screens.
About doubling the size: you can either double the amount of pixels, or the dpi, it’s the same thing. So if your logo.png file is 200×100, make the @2x file 400×200, or just double the dpi (from 72 to 144 for example.)
There are plugins that do most of the heavy lifting for you, and create the @2x images automatically. Here is one such plugin: http://wordpress.org/extend/plugins/wp-retina-2x We tested it a little bit, and it seems to work once you get the settings right.
2.) CSS Background Images:
Retina.js works great for replacing images in <img> tags, but it does not replace CSS background images or sprites. You’ll still need to write some extra CSS to accomplish this.
.icon {
  background-image: url(example.png);
  background-size: 200px 300px;
  height: 300px;
  width: 200px;
}

@media only screen and (-Webkit-min-device-pixel-ratio: 1.5),
only screen and (-moz-min-device-pixel-ratio: 1.5),
only screen and (-o-min-device-pixel-ratio: 3/2),
only screen and (min-device-pixel-ratio: 1.5) {
  .icon {
    background-image: url(example@2x.png);
  }
}
Here you are using media queries to tell Retina displays to display a bigger image. Make sure you don’t forget the background-size attribute!
3.) Icons And Buttons:
Icons and buttons are extremely important to update so that your site looks crisp on a Retina display. There are tons of articles on CSS buttons, and online button generators, so I’m not going to rehash that here.
4.) Icon Fonts:
Icon images are out. They don’t scale, they look terrible on a Retina screen, and they are just lame in general. Icon fonts are what the hip kids are using these days, get with the times! Icon fonts allow you to serve scalable vector images with very minimal browser load, and very easy implementation.

Font Awesome is one of the most robust font icon libraries, and it has great documentation. It is “The iconic font designed for use with Twitter Bootstrap” and it has over 200 icons included. Most font icons are installed simply by uploading the provided files, and adding an @font-face declaration. Here’s an example from Font Awesome:
/* Font Awesome by Dave Gandy http://fortawesome.github.com/Font-Awesome/
-------------------------------------------------------------- */

@font-face {
  font-family: "FontAwesome";
  src: url('api/fonts/fontawesome-webfont.eot');
  src: url('api/fonts/fontawesome-webfont.eot?#iefix') format('eot'), url('api/fonts/fontawesome-webfont.woff') format('woff'), url('api/fonts/fontawesome-webfont.ttf') format('truetype'), url('api/fonts/fontawesome-webfont.svg#FontAwesome') format('svg');
  font-weight: normal;
  font-style: normal;
}
Then you can add cool font icons like this Facebook logo, all deliciously scalable and customizable.
5.) Favicons:
Making a retina compatible favicon is easy. A normal favicon is a 16px by 16px .png file, renamed to favicon.ico. To make your favicon Retina compatible, just recreate your favicon at 32px by 32px. To do this, just create a Photoshop document at 32×32, add your image, and save as a png24 (with transparency if you need it). Then rename the image to favicon.ico, and upload to your site root folder (or theme images folder for some themes).

Last Words:
Honestly we wouldn’t worry about making every single image in your theme Retina compatible. It’s great if you do, but the most important things are your logo, buttons, icons, and prominent images. If you have any other tips, please leave them in the comments below. Happy themeing!


I really enjoyed reading your blog, you have lots of great content. I look forward to reading more posts from you. Thanks for sharing important point.
Welcome here and thanks for liking our article and sharing your views.
Truly enlightening relief of knowing that you have stated, a big manages for setting up.
Welcome here and thanks for sharing your views.
Great posts for for website looks it’s works better for me. Thanks a lots
Welcome here and thanks for liking our article and sharing your views.
Your post is really inspiring for me. I really like the picture as well:) Thanks for sharing.
Welcome here and thanks for liking our article.
@EXEIdeas
I truly delighted in perusing your web journal, you have heaps of awesome substance. I anticipate perusing more posts from you. A debt of gratitude is in order for sharing essential point..
regards
rakhi
Welcome here and thanks for liking our article and sharing your views. Stay with us to get more like this.
wow, love this post!
Thank you for sharing.
Welcome here and thanks for liking our article.
Icons are not important for site to look good. It is color scheme that is more effective for site to look good.
Welcome here and thanks for reading our article and sharing your views.
“icons and color scheme” both are also effective for any site looking
Welcome here and thanks for reading our article and sharing your views.
Great post. Thank you for sharing such an informative article.
Welcome here and thanks for reading our article and sharing your views.
This post is really helpful me.. Thanks for sharing..
Regards
Raj Sharma
Welcome here and thanks for reading our article and sharing your views.