
WordPress is so easy to control and to add your desire too with full function. So in start we will talk about builtin function of WordPress that are valuable for newbies and pro too. Here in this article we will explain the function, features and best setting for WordPress media setting.
Table of Contents
WordPress Media Dashboard Settings:
Here you have to select the size of your uploaded images when you will upload an image via WordPress Dashboard. After uploading, in the right sidebar of WordPress media upload window, you will see some option to edit your media and there will be three size to choose and one option to choode original image size. So there three sizes option can be change not from there but from here in WordPress Media Dashboard. The sizes listed below determine the maximum dimensions in pixels to use when inserting an image into the body of a post.
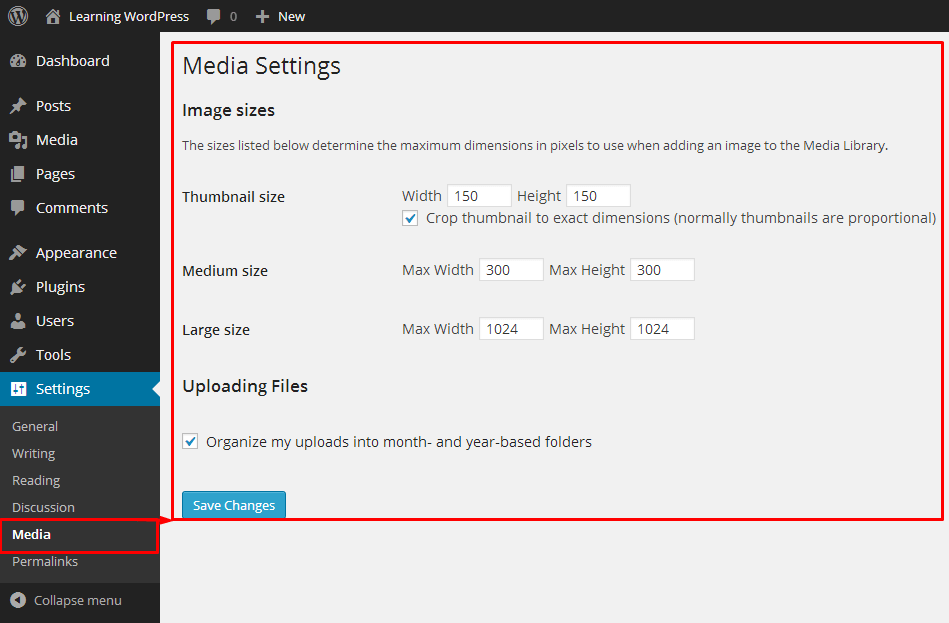
Image sizes
Thumbnail size – Enter the Width and Height
Crop thumbnail to exact dimensions (normally thumbnails are proportional) – check box
Medium size – Enter the Max Width and Max Height
Large size – Enter the Max Width and Max Height
Uploading Files
Organize my uploads into month- and year-based folders – Check this box if you wish to organize your uploads into folders based on the year and the month of the upload. As of 3.5, wp-content/uploads is the default path setting for the uploads folder. Assuming this is your path setting, if you check this box, a file uploaded in June of 2010 would be placed into the wp-content/uploads/2010/06 folder. Note: At the time of the actual upload, WordPress will automatically create the folders, such as wp-content/uploads/2010 and wp-content/uploads/2010/06, as long as your wp-content folder is writeable.
Save Changes
Click the Save Changes button to ensure any changes you have made to your Settings are saved to your database. Once you click the button, a confirmation text box will appear at the top of the page telling you your settings have been saved.
WordPress Media Upload Window At Post Editor Dashboard:
The above setting will be visible to use in WordPress post editior dashboard when you will “Add Media”. After uploading a media, you will expirence the below screenshoot in your media upload window side bar.
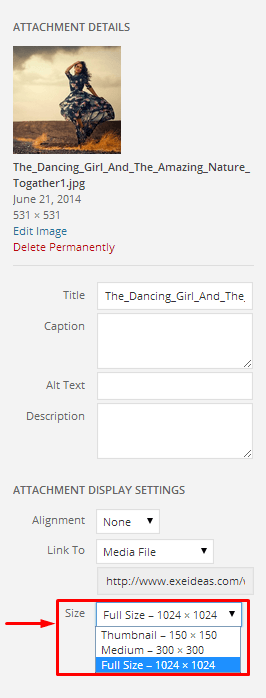
Now under “Attachment Display Setting”, you will see a Size dropdown menu where your provided above three sized will be available. So now there you can select which size of image to add. Keep in mind that all images will be actually in these size not through CSS.
Last Words:
This is what we have and shared in easy steps for newbies so that they can easily know how it works. Stay with us because we are going to share a whole guide step by step about WordPress and make it easy for you. If you liked it then share it and be with us to get next tutorial. If you have any problem then feel free to ask us. We will help you with what we can or have.


Be the first to write a comment.