

Connecting WordPress with a custom CRM, SaaS dashboard, ERP, mobile backend, membership platform, inventory system, admin portal, or another business application often begins with one requirement: when something changes in one system, the other system should know about it.
This is where developers usually start talking about webhooks. However, there is an important architectural distinction that prevents many integrations from becoming unnecessarily complicated.
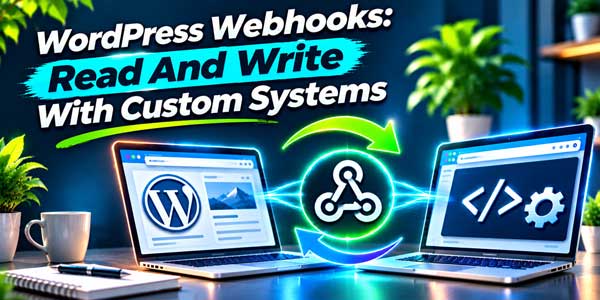
Webhooks are primarily event notifications. They tell another system that something happened. If your custom application needs to read WordPress data, search records, update posts, upload media, or create content, the WordPress REST API is normally the better read/write interface.
A Strong Two-Way WordPress Integration Usually Uses Both Technologies: Webhooks Push Events When Something Changes, While REST APIs Read Or Write The Actual Business Data.
A production architecture might therefore work like this:
WordPress
    ↓
Signed Outbound Webhook
    ↓
Custom System
    ↓
Processes Event
    ↓
WordPress REST API
    ↓
Read Or Write WordPress Data
The opposite direction can work similarly. Your custom system can notify WordPress through a secured custom REST endpoint, while standard WordPress REST endpoints handle normal content creation and updates.
This guide explains how to build that architecture correctly in 2026, including outbound WordPress webhooks, inbound WordPress webhook endpoints, HMAC signatures, Application Passwords, custom REST routes, post-change hooks, retry handling, idempotency, synchronization loops, security, queues, logging, and reliable two-way data synchronization.
Table of Contents
Understand The Difference Between Webhooks And REST APIs
A REST API is usually request-driven.
Your system asks:
GET /wp-json/wp/v2/posts/123
WordPress then returns the requested post.
A webhook reverses that relationship.
Instead of your application repeatedly asking WordPress whether something changed, WordPress sends an HTTP request to your application when an event occurs.
For example:
WordPress Post Published
        ↓
POST https://app.example.com/webhooks/wordpress
        ↓
Custom System Receives Event
This allows integrations to react quickly without continuously polling WordPress.
Use Webhooks For Events And REST APIs For Data
A useful rule is:
- Webhook: “Something Happened.”
- REST API: “Give Me This Data” Or “Change This Data.”
Suppose a WordPress article changes.
The webhook might send:
{
    "event": "post.updated",
    "post_id": 218
}
Your custom system can then request the authoritative data from:
GET /wp-json/wp/v2/posts/218
This keeps webhook payloads relatively focused while WordPress remains the authoritative content source.
When Should WordPress Send A Webhook?
Common WordPress webhook events include:
- A post is created.
- A post is updated.
- A post is published.
- A page changes.
- A custom post type changes.
- A user registers.
- A profile changes.
- A comment is created.
- An order changes in an e-commerce integration.
- Custom metadata changes.
You do not need to send every WordPress event to every integration.
Define only the events your external system actually needs.
Design Your Webhook Event Names Before Writing Code
A consistent event taxonomy makes integrations easier to maintain.
Examples include:
post.createdpost.updatedpost.publishedpost.deletedpage.updateduser.createdproject.updated
Use predictable naming instead of allowing every developer to invent unrelated event names.
This becomes especially important once several applications consume the same WordPress events.
Choose The Correct WordPress Hook
WordPress provides many action hooks that can trigger integration logic.
For post-related synchronization, useful hooks include:
save_postsave_post_{post_type}wp_after_insert_posttransition_post_status
The best hook depends on what the external application needs to know.
Use Wp_After_Insert_Post When You Need Complete Saved Data
wp_after_insert_post fires after the post, its terms, and metadata have been saved.
This can make it particularly useful when the webhook payload depends on the final post state.
Example:
add_action(
    'wp_after_insert_post',
    'company_bridge_post_changed',
    10,
    4
);

function company_bridge_post_changed(
    $post_id,
    $post,
    $update,
    $post_before
) {
    // Build integration event here.
}
The callback receives the post ID, post object, whether the operation was an update, and the previous post object when available.
Use Transition_Post_Status For Publishing Events
If the integration specifically cares about publication status, transition_post_status can be useful.
add_action(
    'transition_post_status',
    'company_bridge_status_change',
    10,
    3
);

function company_bridge_status_change(
    $new_status,
    $old_status,
    $post
) {
    if (
        $new_status === 'publish' &&
        $old_status !== 'publish'
    ) {
        // Post was newly published.
    }
}
Be aware that the transition hook can also run when the old and new statuses are the same during some updates.
Always compare the actual states rather than assuming every invocation represents a real status change.
Avoid Sending Webhooks For Autosaves And Revisions
WordPress can create revisions and autosaves during normal editing.
If your integration treats every save as a business event, one editor could unintentionally produce many unnecessary webhook requests.
Filter them:
if (wp_is_post_revision($post_id)) {
    return;
}

if (wp_is_post_autosave($post_id)) {
    return;
}
You may also want to ignore:
- Auto-drafts.
- Unsupported post types.
- Temporary content states.
Create A Clean Webhook Payload
A useful payload should contain enough information to identify and process the event without leaking unnecessary internal data.
Example:
{
    "id": "32e18e16-b3de-4be1-b4ef-81ef1c5bdb32",
    "event": "post.updated",
    "created_at": "2026-11-08T10:30:00Z",
    "source": "wordpress",
    "data": {
        "post_id": 218,
        "post_type": "post",
        "status": "publish",
        "modified_gmt": "2026-11-08T10:29:51Z"
    }
}
Important fields include:
- Event ID: Unique identifier for idempotency.
- Event Type: Defines what occurred.
- Timestamp: Helps prevent replay attacks and debug delays.
- Resource ID: Identifies the WordPress resource.
- Source: Useful when multiple systems emit events.
Do Not Send Sensitive Data Unless It Is Required
A webhook usually does not need the entire WordPress database record.
Avoid unnecessarily sending:
- Passwords.
- Authentication tokens.
- Private user information.
- Internal configuration.
- Unused metadata.
The receiver can retrieve additional authorized data through an API if necessary.
Sign Every Webhook With HMAC
A webhook URL is accessible through the internet.
Your custom application cannot safely assume that every request reaching that URL came from WordPress.
A strong solution is an HMAC signature.
Both systems share a private webhook secret.
WordPress signs the exact request body, and the receiving application independently calculates the expected signature.
If the signatures match, the receiver knows that the sender possessed the shared secret and the body was not modified after signing.
Keep The Webhook Secret Outside Plugin Source Code
Do not commit your production webhook secret into Git.
You can define it through secure server configuration or wp-config.php.
Conceptually:
define(
    'COMPANY_WEBHOOK_SECRET',
    getenv('COMPANY_WEBHOOK_SECRET')
);
The exact secrets-management mechanism depends on your hosting environment.
The important rule is that the secret should not be publicly accessible or stored casually inside theme or plugin source code.
Create An HMAC Signature
A strong signing strategy can combine a timestamp with the raw JSON body.
$timestamp = (string) time();

$signature = hash_hmac(
    'sha256',
    $timestamp . '.' . $body,
    COMPANY_WEBHOOK_SECRET
);
The request can send headers such as:
X-Webhook-Timestamp: 1794148200
X-Webhook-Signature: sha256=SIGNATURE_VALUE
The receiver must use the exact same signing format.
Send An Outbound WordPress Webhook
WordPress provides an HTTP API for server-side requests.
A practical webhook sender can look like:
function company_send_webhook(
    string $event,
    array $data
): bool {
    $endpoint = COMPANY_WEBHOOK_URL;
    $event_id = wp_generate_uuid4();

    $payload = [
        'id'         => $event_id,
        'event'      => $event,
        'created_at' => gmdate('c'),
        'source'     => 'wordpress',
        'data'       => $data,
    ];

    $body      = wp_json_encode($payload);
    $timestamp = (string) time();

    $signature = hash_hmac(
        'sha256',
        $timestamp . '.' . $body,
        COMPANY_WEBHOOK_SECRET
    );

    $response = wp_safe_remote_post(
        $endpoint,
        [
            'timeout' => 10,
            'headers' => [
                'Content-Type'        => 'application/json',
                'X-Webhook-Id'        => $event_id,
                'X-Webhook-Timestamp' => $timestamp,
                'X-Webhook-Signature' => 'sha256=' . $signature,
            ],
            'body' => $body,
            'data_format' => 'body',
        ]
    );

    if (is_wp_error($response)) {
        return false;
    }

    $status = wp_remote_retrieve_response_code($response);

    return $status >= 200 && $status < 300;
}
This example uses wp_safe_remote_post(), which is especially valuable when an endpoint URL can be configurable because WordPress validates the destination and redirects against unsafe URLs.
Connect The Sender To Post Changes
A basic implementation could be:
add_action(
    'wp_after_insert_post',
    'company_bridge_post_webhook',
    10,
    4
);

function company_bridge_post_webhook(
    $post_id,
    $post,
    $update,
    $post_before
) {
    if (wp_is_post_revision($post_id)) {
        return;
    }

    if (wp_is_post_autosave($post_id)) {
        return;
    }

    if (!in_array($post->post_type, ['post', 'page'], true)) {
        return;
    }

    if ($post->post_status === 'auto-draft') {
        return;
    }

    company_send_webhook(
        $update ? 'post.updated' : 'post.created',
        [
            'post_id'      => $post_id,
            'post_type'    => $post->post_type,
            'status'       => $post->post_status,
            'modified_gmt' => $post->post_modified_gmt,
        ]
    );
}
This is suitable for understanding the architecture.
For high-volume production systems, however, sending external HTTP requests directly inside an editor save operation can make the WordPress request slower and more fragile.
Do Not Make WordPress Publishing Depend On A Remote Server
Imagine a user clicks Publish while your custom system is temporarily offline.
If the WordPress save request waits for a slow external API, the editor may experience:
- Slow publishing.
- Timeouts.
- Confusing errors.
- Repeated submissions.
A stronger production architecture separates creating the webhook event from delivering the webhook event.
Use An Outbox Or Queue For Reliable Delivery
A robust architecture is:
WordPress Event
      ↓
Store Webhook Event
      ↓
Background Delivery
      ↓
Custom System
      ↓
Mark Delivered
Store information such as:
- Event ID.
- Event type.
- Payload.
- Created time.
- Attempt count.
- Next attempt time.
- Delivery status.
- Last HTTP status.
This pattern is often called the outbox pattern.
It gives you a durable record of events even when the destination is temporarily unavailable.
Understand The Limitation Of WP-Cron
WordPress can schedule one-time events with wp_schedule_single_event().
This can support simple retry workflows.
However, normal WP-Cron execution is tied to WordPress traffic. A scheduled event becomes eligible at its scheduled time but generally runs when WordPress receives a request after that time.
For low-traffic sites or mission-critical integrations, consider a real server cron process or dedicated queue infrastructure rather than treating WP-Cron as a guaranteed real-time queue.
Retry Failed Webhooks With Backoff
Transient failures are normal.
Your custom system may temporarily return:
- 500 Internal Server Error.
- 502 Bad Gateway.
- 503 Service Unavailable.
- Timeout.
Do not permanently abandon the event after the first failed attempt.
A retry schedule might look like:
- First Retry: 1 Minute.
- Second Retry: 5 Minutes.
- Third Retry: 30 Minutes.
- Fourth Retry: 2 Hours.
- Final Retry: Several Hours Later.
This is called exponential or progressive backoff.
Do Not Retry Every HTTP Error The Same Way
A temporary 503 may deserve a retry.
A permanent 401 usually means the receiver rejected your authentication configuration.
A 404 may indicate the webhook endpoint no longer exists.
A 422 may indicate your payload is invalid.
Classify failures rather than retrying broken requests forever.
Make Webhook Consumers Idempotent
Reliable webhook systems generally provide at-least-once delivery, not a guarantee that every event arrives exactly once.
This means the same event may be delivered more than once.
Your receiver must therefore recognize duplicate events.
This is why every webhook should include a unique event ID.
Receiver logic becomes:
If Event ID Already Processed:
    Return Success
Else:
    Process Event
    Record Event ID
    Return Success
This is called idempotent processing.
Why Duplicate Protection Is Critical
Suppose the webhook represents:
subscription.payment_received
The receiver processes the payment successfully but its HTTP response is lost.
WordPress assumes delivery failed and retries.
Without idempotency, the external system could potentially process the same business event twice.
Verify The Webhook Signature Before Parsing Business Data
The custom system should read the raw request body first.
Conceptual PHP receiver:
$body      = file_get_contents('php://input');
$timestamp = $_SERVER['HTTP_X_WEBHOOK_TIMESTAMP'] ?? '';
$signature = $_SERVER['HTTP_X_WEBHOOK_SIGNATURE'] ?? '';

if (!ctype_digit($timestamp)) {
    http_response_code(401);
    exit;
}

if (abs(time() - (int) $timestamp) > 300) {
    http_response_code(401);
    exit;
}

$expected = 'sha256=' . hash_hmac(
    'sha256',
    $timestamp . '.' . $body,
    $webhookSecret
);

if (!hash_equals($expected, $signature)) {
    http_response_code(401);
    exit;
}

$event = json_decode(
    $body,
    true,
    flags: JSON_THROW_ON_ERROR
);
The exact same raw body that WordPress signed must be used during verification.
Re-encoding parsed JSON before verification can produce a different byte sequence and cause legitimate signatures to fail.
Add Timestamp Validation To Prevent Replay Attacks
A valid signature proves that a request was signed with the shared secret.
It does not automatically prove that the request is fresh.
An attacker who captures a legitimate signed request might attempt to replay it later.
Including a timestamp in the signed message allows the receiver to reject requests outside a small acceptable window, such as five minutes.
The unique event ID provides a second layer against replay.
Return Success Quickly From Webhook Receivers
The webhook receiver should generally:
- Authenticate The Request.
- Validate Basic Payload Structure.
- Store Or Queue The Event.
- Return A 2xx Response Quickly.
- Perform Heavy Processing In The Background.
Do not keep WordPress waiting while the receiver generates large reports, contacts several third-party APIs, or performs heavy processing.
Use WordPress REST API For Reading Data
Your custom system can read WordPress content through standard REST endpoints.
Examples include:
GET /wp-json/wp/v2/posts

GET /wp-json/wp/v2/posts/218

GET /wp-json/wp/v2/pages

GET /wp-json/wp/v2/media
For public content, authentication may not be required.
Private data requires appropriate WordPress authentication and capabilities.
Use Application Passwords For Server-To-Server REST Access
WordPress provides Application Passwords for programmatic access.
An Application Password is associated with a WordPress user but is separate from that user’s normal interactive login password.
For a custom backend integration:
- Create A Dedicated Integration User.
- Give It Minimum Required Capabilities.
- Create A Named Application Password.
- Store It In The Custom System Server.
- Use HTTPS For Every Request.
Do not use your main WordPress administrator password for API integration.
Read A WordPress Post From Your Custom System
For example:
GET https://example.com/wp-json/wp/v2/posts/218
An authenticated server-to-server request can use HTTP Basic Authentication with the integration user’s username and Application Password.
The credential belongs on the custom system’s server, never inside public browser JavaScript.
Write WordPress Data Through The REST API
To create a new post:
POST /wp-json/wp/v2/posts
Example request body:
{
    "title": "Article Created By Custom System",
    "content": "<p>Content goes here.</p>",
    "status": "draft"
}
WordPress performs its normal authentication and capability checks before accepting the operation.
Update WordPress Data Through The REST API
To update an existing post:
POST /wp-json/wp/v2/posts/218
Example:
{
    "title": "Updated Article Title",
    "status": "publish"
}
This is usually preferable to creating a custom webhook whose only purpose is to duplicate standard WordPress post-update functionality.
Use Core REST Endpoints Before Creating Custom Ones
WordPress already provides REST controllers for common resources.
Before writing custom integration code, check whether the existing API supports:
- Posts.
- Pages.
- Media.
- Users.
- Comments.
- Categories.
- Tags.
Custom endpoints should solve custom business requirements rather than unnecessarily recreating core APIs.
Create Custom REST Routes For Custom Business Operations
Your custom system may need to send an event that does not map naturally to a WordPress post operation.
Examples include:
- An ERP confirms inventory.
- A SaaS subscription changes.
- A CRM customer becomes qualified.
- An external workflow completes.
Create a custom endpoint inside a WordPress plugin.
add_action('rest_api_init', function () {
    register_rest_route(
        'company-bridge/v1',
        '/events',
        [
            'methods'  => WP_REST_Server::CREATABLE,
            'callback' => 'company_receive_external_event',
            'permission_callback' => 'company_verify_external_event',
        ]
    );
});
The endpoint becomes conceptually:
POST /wp-json/company-bridge/v1/events
Every Custom REST Route Needs A Permission Strategy
WordPress expects REST routes to define a permission_callback.
For routes authenticated through normal WordPress credentials, use capabilities such as:
'permission_callback' => function () {
    return current_user_can('edit_posts');
}
For a true webhook receiver coming from an external system that does not authenticate as a WordPress user, the permission callback can verify your webhook’s cryptographic signature instead.
Create An HMAC-Protected Inbound WordPress Webhook
A simplified signature checker could look like:
function company_verify_external_event(
    WP_REST_Request $request
) {
    $timestamp = $request->get_header(
        'x-webhook-timestamp'
    );

    $signature = $request->get_header(
        'x-webhook-signature'
    );

    if (!$timestamp || !$signature) {
        return new WP_Error(
            'company_missing_signature',
            'Authentication required.',
            ['status' => 401]
        );
    }

    if (
        !ctype_digit($timestamp) ||
        abs(time() - (int) $timestamp) > 300
    ) {
        return new WP_Error(
            'company_expired_signature',
            'Invalid request.',
            ['status' => 401]
        );
    }

    $expected = 'sha256=' . hash_hmac(
        'sha256',
        $timestamp . '.' . $request->get_body(),
        COMPANY_INBOUND_WEBHOOK_SECRET
    );

    if (!hash_equals($expected, $signature)) {
        return new WP_Error(
            'company_invalid_signature',
            'Authentication failed.',
            ['status' => 401]
        );
    }

    return true;
}
The custom system must generate the signature with the exact same secret and signing format.
Do Not Use WordPress Nonces For External Server Authentication
WordPress nonces are designed primarily to protect actions involving authenticated WordPress browser sessions, including REST requests using cookie authentication.
They are not a replacement for API credentials or cryptographic webhook authentication between independent servers.
For external systems, use an appropriate server-to-server authentication mechanism such as:
- Application Passwords.
- HMAC webhook signatures.
- Another carefully implemented authentication integration.
Also remember that WordPress nonces do not replace authorization checks.
Validate Inbound Webhook Data Before Writing To WordPress
Cryptographic authentication tells you that the request came from a party holding the secret.
It does not mean every submitted value should automatically be trusted as valid business data.
Validate:
- Required fields.
- Data types.
- Allowed event names.
- Maximum string lengths.
- Allowed statuses.
- Resource identifiers.
Then sanitize values according to how WordPress will use them.
Write Data With WordPress APIs Instead Of Direct Database Queries
When processing inbound events, use WordPress APIs such as:
wp_insert_post()wp_update_post()update_post_meta()wp_set_object_terms()
Do not directly insert records into wp_posts or wp_postmeta unless you have an exceptional reason and fully understand the consequences.
Using WordPress APIs preserves normal hooks, validation behavior, metadata handling, and compatibility.
Example Inbound Event Handler
Suppose your custom system sends:
project.updated
The callback can validate and update a related WordPress custom post type.
function company_receive_external_event(
    WP_REST_Request $request
) {
    $event = $request->get_json_params();

    if (
        empty($event['id']) ||
        empty($event['event']) ||
        empty($event['data'])
    ) {
        return new WP_Error(
            'company_invalid_payload',
            'Invalid payload.',
            ['status' => 400]
        );
    }

    if ($event['event'] !== 'project.updated') {
        return new WP_Error(
            'company_unsupported_event',
            'Unsupported event.',
            ['status' => 422]
        );
    }

    $post_id = absint(
        $event['data']['wordpress_post_id'] ?? 0
    );

    if (!$post_id) {
        return new WP_Error(
            'company_missing_post',
            'Post identifier required.',
            ['status' => 422]
        );
    }

    $result = wp_update_post(
        [
            'ID' => $post_id,
            'post_title' => sanitize_text_field(
                $event['data']['title'] ?? ''
            ),
        ],
        true
    );

    if (is_wp_error($result)) {
        return $result;
    }

    return new WP_REST_Response(
        [
            'success' => true,
            'post_id' => $result,
        ],
        200
    );
}
Real implementations should also verify ownership, post type, event idempotency, and business permissions.
Prevent Webhook Synchronization Loops
Two-way integrations can easily create a dangerous loop.
Example:
Custom System Updates WordPress
        ↓
WordPress Sends Updated Webhook
        ↓
Custom System Processes Webhook
        ↓
Custom System Updates WordPress Again
        ↓
Loop Continues
You need a strategy for identifying the origin of a change.
Include An Origin Or Correlation Identifier
A synchronization event can contain:
{
    "id": "EVENT_UUID",
    "event": "project.updated",
    "origin": "custom-system",
    "correlation_id": "REQUEST_UUID"
}
WordPress can record the external correlation identifier when processing the change.
When its normal save hook fires, your outbound integration can decide whether another webhook is actually necessary.
Use Idempotency On Both Sides
Both WordPress and your custom platform should keep track of processed external event IDs.
For low-volume prototypes, a temporary store may work.
For business-critical systems, use a durable event table with a unique constraint on the external event ID.
This protects against:
- Network retries.
- Duplicate webhook deliveries.
- Manual retry operations.
- Repeated queue processing.
Decide Which System Owns Each Field
Two-way synchronization becomes dangerous when both systems can independently edit every field.
Define ownership.
| Data | Source Of Truth |
|---|---|
| Article Content | WordPress |
| Customer Billing | Custom System |
| Featured Image | WordPress |
| Subscription Status | Custom System |
| Public Slug | WordPress |
Without clear ownership, updates can overwrite newer information with stale values from the other platform.
Use Version Numbers Or Updated Timestamps
Suppose WordPress and your custom system both modify the same record within seconds.
Which update wins?
Use fields such as:
updated_atversionmodified_gmt
Then implement a conflict policy.
Possible policies include:
- Newest update wins.
- WordPress always wins for content.
- Custom system always wins for billing data.
- Conflict requires manual review.
Build A Mapping Table Between Systems
Do not depend only on titles, slugs, or email addresses to match records.
Maintain explicit IDs.
A synchronization table might contain:
id
wordpress_post_id
external_record_id
resource_type
last_synced_at
last_external_version
sync_status
This makes reconciliation and troubleshooting much easier.
Version Your Webhook Schema
Webhook payloads become integration contracts.
Eventually you may need to rename fields or change data structures.
Include a version:
{
    "schema_version": 1,
    "event": "post.updated"
}
Alternatively, version the endpoint:
/webhooks/wordpress/v1
Do not suddenly change production payload structures when external systems depend on them.
Version Custom WordPress REST Routes
Use namespaces such as:
company-bridge/v1
rather than:
company-bridge
A future incompatible implementation can introduce:
company-bridge/v2
while older clients continue using version one during migration.
Log Every Webhook Delivery
A production integration needs observability.
Store:
- Event ID.
- Event type.
- Destination.
- Attempt number.
- HTTP status.
- Response time.
- Error category.
- Delivered timestamp.
Do not log the shared secret or full authorization credentials.
Create A Webhook Delivery Dashboard
A custom WordPress integration plugin can provide an administrative screen showing:
- Successful deliveries.
- Pending events.
- Failed events.
- Retry count.
- Last response status.
This dramatically reduces debugging time compared with reading raw PHP logs.
Add Manual Retry Capability
Administrators may need to retry a failed event after fixing the remote system.
A manual retry feature should reuse the original event ID and payload rather than generating an unrelated new business event.
The receiving system’s idempotency logic protects against accidental duplicate processing.
Create A Dead Letter State
An event that continues failing after the maximum number of attempts should not retry forever.
Move it into a failed or dead letter state.
An administrator can then inspect:
- Why delivery failed.
- Which HTTP response was returned.
- Whether the destination changed.
- Whether a manual retry is appropriate.
Protect Webhook URLs From SSRF
If administrators can configure arbitrary webhook URLs, your WordPress server could potentially be tricked into requesting internal network resources.
This is a server-side request forgery risk.
Use wp_safe_remote_post() for arbitrary or configurable destination URLs because WordPress validates the destination and redirects against unsafe URLs.
For tightly controlled integrations, also consider an explicit domain allowlist.
Require HTTPS For Webhook Destinations
Webhook payloads can contain sensitive operational information.
Require HTTPS in production.
Do not send signatures, identifiers, private status information, or business records through plaintext HTTP.
Rotate Webhook Secrets
A production webhook secret should not exist forever without an operational plan.
Support:
- Credential rotation.
- Emergency revocation.
- Separate staging and production secrets.
- Separate secrets for different integrations.
For seamless rotation, sophisticated systems can temporarily support both the current and next secret while both sides migrate.
Do Not Reuse One Secret Everywhere
If five unrelated external systems share the same webhook secret, compromise of one system compromises authentication for all five.
Create a unique secret per destination or integration.
This makes revocation much safer.
Use Capability Checks For Human-Initiated REST Actions
HMAC signatures are useful for machine-to-machine webhook authentication.
For normal WordPress REST operations authenticated as WordPress users, use WordPress’s role and capability system.
For example:
current_user_can('edit_post', $post_id)
is often stronger than a generic:
current_user_can('edit_posts')
when the operation targets a specific resource.
Do Not Treat Authentication As Authorization
A valid Application Password proves which WordPress user is making the request.
It does not mean that user should be allowed to perform every operation.
Your integration must still respect WordPress capabilities and object-level access rules.
Use A Dedicated Integration User
Create a WordPress account specifically for the custom system.
Benefits include:
- Clear audit history.
- Easy credential revocation.
- Minimal permissions.
- No dependency on an employee’s personal account.
If the integration only needs to edit posts, it should not automatically receive full administrator privileges.
Use A Plugin Instead Of Theme Code
Webhook and integration logic should normally live inside a dedicated plugin.
A theme controls website presentation.
An integration is application infrastructure.
Putting integration logic in a theme creates unnecessary coupling and can break the integration when the site’s design changes.
Recommended Plugin Structure
company-wordpress-bridge/
├── company-wordpress-bridge.php
├── src/
│   ├── Events/
│   ├── Webhooks/
│   ├── Rest/
│   ├── Security/
│   ├── Queue/
│   └── Logging/
└── uninstall.php
Even a relatively small integration benefits from separating event capture, delivery, REST routes, authentication, and logging.
Create Separate Staging And Production Endpoints
Never test webhook development by sending experimental events into the live production business system.
Use separate:
- WordPress environments.
- Webhook URLs.
- Webhook secrets.
- Application Passwords.
- External-system databases.
This prevents development testing from modifying real customer records.
Create A Webhook Test Button
Your plugin settings page can provide:
Send Test Webhook
The test event might contain:
{
    "event": "integration.test",
    "created_at": "2026-11-08T12:00:00Z"
}
This allows administrators to verify URL connectivity and signature configuration without creating or editing a real post.
Create A Connection Health Check
A useful integration dashboard can display:
- Webhook URL configured.
- Last successful delivery.
- Last failed delivery.
- Pending events.
- REST authentication status.
Integration problems become operationally visible instead of remaining hidden until a customer reports missing data.
Use Polling As A Recovery Mechanism
Webhooks are efficient but should not always be your only synchronization mechanism.
Imagine a serious outage where several webhook events are permanently lost.
A periodic reconciliation process can query records modified after the last successful sync and compare both systems.
This architecture becomes:
Real-Time Path: Webhooks

Recovery Path: Periodic REST Reconciliation
This combination provides stronger eventual consistency.
Use Modified Dates For Incremental Reconciliation
WordPress REST collections can support filters around modification times for relevant resources.
Instead of retrieving every post during reconciliation, request only recently modified resources where supported.
This reduces network traffic and database work.
Do Not Assume Webhook Delivery Order
Network timing can produce unexpected order.
For example:
Event 1: post.updated
Event 2: post.updated
Event 2 might arrive before Event 1 because Event 1 was retried.
Use timestamps, version counters, or resource modification times when event ordering matters.
Do Not Assume Exactly-Once Delivery
Exactly-once event delivery is difficult in distributed systems.
Design around:
At-Least-Once Delivery + Idempotent Processing.
This is generally more reliable than pretending duplicate events can never occur.
Keep Webhook Payloads Small
Large payloads increase:
- Network cost.
- Signing work.
- Storage requirements.
- Retry overhead.
- Exposure of unnecessary data.
Send the information required to identify and classify the event.
Let the receiver retrieve larger resources through REST when necessary.
Consider Sending A Resource Snapshot When Necessary
Not every integration should use thin events.
If the external system must process the state exactly as it existed at event time, include a controlled snapshot of the relevant fields.
This avoids a race condition where the resource changes again before the receiver fetches it.
Choose between:
- Thin Event: ID + event metadata.
- Snapshot Event: Includes required resource state.
The correct model depends on the business workflow.
Use Correlation IDs Across Both Systems
When one operation crosses several services, troubleshooting becomes difficult.
Generate a correlation ID:
correlation_id: 64ec084a-d05e-4eee-b29c-bc42bdafcb26
Log it in:
- WordPress.
- Webhook delivery records.
- Custom system API logs.
- Background jobs.
You can then trace one business operation across the complete integration.
Test Failure Scenarios, Not Only Success
Many integrations work perfectly when both systems are online.
Production problems appear when something fails.
Test scenarios such as:
- Receiver returns 500.
- Receiver times out.
- Signature is invalid.
- Duplicate event arrives.
- Events arrive out of order.
- WordPress REST credentials expire or are revoked.
- Custom system is offline for one hour.
Your architecture should recover predictably.
Test Webhook Signatures Automatically
Add automated tests for:
- Correct signature accepted.
- Modified body rejected.
- Wrong secret rejected.
- Old timestamp rejected.
- Missing signature rejected.
Security code is particularly valuable to test because a small formatting mismatch can either break legitimate requests or weaken verification.
WordPress Webhook Security Checklist
- HTTPS: Required For Production Webhooks.
- HMAC: Sign Outbound And Custom Inbound Webhooks.
- Timestamp: Prevent Replay Of Old Requests.
- Event ID: Enable Idempotent Processing.
- Secret Storage: Keep Secrets Outside Public Source Code.
- Secret Isolation: Use Separate Secrets Per Integration.
- REST Authentication: Use Application Passwords Where Appropriate.
- Authorization: Apply WordPress Capability Checks.
- Input Validation: Validate Every Inbound Field.
- SSRF Protection: Use Safe HTTP Requests For Configurable URLs.
- Logging: Never Log Full Secrets.
- Retries: Use Controlled Backoff.
- Duplicate Protection: Process Each Event ID Once.
Recommended Two-Way Integration Architecture
┌──────────────────────────────┐
│          WordPress           │
│ Posts • Users • Media • CPTs │
└──────────────┬───────────────┘
               │
        WordPress Event
               │
               ▼
┌──────────────────────────────┐
│      Webhook Outbox          │
│ Pending • Retry • Delivered  │
└──────────────┬───────────────┘
               │ HMAC + HTTPS
               ▼
┌──────────────────────────────┐
│        Custom System         │
│ CRM • SaaS • ERP • Portal    │
└──────────────┬───────────────┘
               │
       REST API Read / Write
               │
               ▼
┌──────────────────────────────┐
│       WordPress REST API     │
│ Core Routes + Custom Routes  │
└──────────────────────────────┘
This architecture separates notification, synchronization, authentication, and data ownership.
A Practical Implementation Roadmap
- Define Which System Owns Each Record Type.
- Define The Events Your Integration Actually Needs.
- Create A Dedicated WordPress Integration Plugin.
- Capture WordPress Events Through Appropriate Hooks.
- Create Versioned Webhook Payloads.
- Add UUID Event IDs And Correlation IDs.
- Sign Every Event With HMAC.
- Build A Receiver That Verifies Raw-Body Signatures.
- Add Replay Protection And Idempotency.
- Store Events In A Durable Outbox.
- Add Retry And Dead-Letter Handling.
- Use WordPress REST API For Standard Reads And Writes.
- Create Custom Routes Only For Custom Operations.
- Add Application Password Authentication Where Appropriate.
- Add Logging, Monitoring, Reconciliation, And Manual Retry Tools.
Common WordPress Webhook Integration Mistakes
- Using Webhooks For Everything: Use REST APIs for normal reads and writes.
- No Signature: Anyone could impersonate the sender.
- Signing Parsed JSON: Verify against the exact raw body.
- No Replay Protection: Add timestamp and event ID checks.
- No Idempotency: Duplicate events can corrupt business logic.
- Calling External APIs During Every Save: Queue production deliveries.
- No Retry Strategy: Temporary outages cause lost synchronization.
- Infinite Sync Loops: Track origin and correlation identifiers.
- One Shared Secret Everywhere: Isolate each integration.
- Using WordPress Admin Credentials: Create a dedicated integration user.
- Using Nonces As External Authentication: Use proper server credentials or HMAC.
- Direct Database Writes: Prefer WordPress APIs.
- No Reconciliation: Maintain a recovery synchronization path.
When Webhooks Are Better Than Polling
Webhooks are strong when:
- Changes need to appear quickly.
- Updates are relatively infrequent.
- Polling would generate many empty requests.
- The receiving system can expose a secure endpoint.
A post publication event is a good example.
There is little reason for a custom application to ask WordPress every five seconds whether a new article was published if WordPress can notify it immediately.
When Polling May Still Be Better
Polling can be appropriate when:
- The external system cannot receive inbound internet requests.
- Near-real-time synchronization is unnecessary.
- The integration is extremely simple.
- Periodic batch synchronization is sufficient.
The strongest enterprise-style integrations often use webhooks for speed and scheduled reconciliation for reliability.
Final Verdict On WordPress Webhooks And Two-Way Integration
WordPress can integrate extremely well with custom systems, but the architecture becomes much cleaner once webhooks and REST APIs are given different responsibilities.
Webhooks should primarily communicate events.
When a post is created, updated, published, deleted, or otherwise changed, WordPress can emit a signed webhook telling the external system what happened.
The WordPress REST API should handle most standard data access.
If your CRM, SaaS platform, admin portal, or ERP needs to retrieve a post, update a page, create content, or manage media, use the existing REST API instead of inventing a webhook-based read/write protocol.
For WordPress-to-custom-system events, use appropriate WordPress hooks.
wp_after_insert_post is particularly useful when your webhook needs the post after its terms and metadata have been saved.
For publication-specific workflows, status-transition hooks provide a more focused trigger.
Filter out revisions, autosaves, auto-drafts, and irrelevant post types so routine editorial behavior does not create unnecessary integration traffic.
Every production webhook should be authenticated.
HMAC signatures provide a practical pattern because WordPress and the receiver can share a private secret without transmitting the secret with each request.
Sign the timestamp together with the exact raw JSON body.
The receiver should validate the timestamp, independently calculate the expected signature, compare it using hash_equals(), and reject requests that are too old or incorrectly signed.
Every event should also have a unique identifier.
This allows the receiving application to recognize retries and process the event idempotently.
Do not assume a webhook will arrive only once.
A reliable distributed integration should expect duplicate deliveries, temporary network failures, delayed events, and potentially out-of-order events.
This is why retry queues, idempotency, timestamps, version numbers, and correlation identifiers matter.
For higher-value integrations, do not send outbound HTTP requests directly inside the critical WordPress publishing request.
Capture the event, store it durably, and deliver it asynchronously.
If the custom system is unavailable, the WordPress editor should still be able to publish normally while the webhook waits for retry.
Use progressive retry intervals and eventually move permanently failing events into a dead-letter state for manual investigation.
For custom-system-to-WordPress writes, use WordPress Application Passwords with standard REST endpoints where the operation maps to existing WordPress resources.
Create a dedicated integration user and give that account only the capabilities it requires.
Do not use your main administrator account simply because it is convenient.
For custom external events that do not map to standard WordPress resources, create versioned custom REST routes inside a plugin.
Every private route needs an explicit authentication and authorization strategy.
It can use normal WordPress capabilities for WordPress-authenticated requests or a carefully implemented HMAC verification process for true external webhooks.
Never treat a WordPress nonce as the authentication mechanism for an unrelated external server.
Nonces help protect authenticated WordPress browser interactions against request forgery but do not replace server-to-server authentication or capability checks.
Two-way synchronization introduces another major risk: loops.
If the custom system updates WordPress, WordPress may emit a webhook, which could cause the custom system to update WordPress again.
Track event origin, correlation IDs, external IDs, and processed event IDs so both systems understand whether a new change represents a real business update or the echo of an earlier synchronization operation.
Define a source of truth for each type of information.
WordPress may own content and media while the custom business application owns subscriptions, billing, customer state, or inventory.
Do not allow both systems to overwrite every field independently without an explicit conflict strategy.
Finally, build observability from the beginning.
Store webhook delivery history, attempt counts, response codes, last errors, synchronization timestamps, and correlation IDs.
Give administrators a way to see failed events and retry them safely.
Use periodic reconciliation through REST as a recovery layer so a rare lost event does not permanently leave the systems inconsistent.
The Best WordPress Integration Architecture In 2026 Is Event-Driven But API-Centered: Use Secure Signed Webhooks To Announce Changes, Use The WordPress REST API To Read And Write Data, Use Durable Queues And Idempotency For Reliability, And Define Clear Data Ownership So WordPress And Your Custom System Can Remain Synchronized Without Creating Security Gaps Or Update Loops.
Everyday Reader Frequently Asked Questions
Does WordPress Support Webhooks?
WordPress provides an extensive hook system and HTTP API that developers can use to implement outbound webhooks. A custom plugin can listen for WordPress events such as post changes and send signed HTTP requests to an external application. For inbound integrations, custom REST API routes can act as secure webhook receivers.
How Do I Send A Webhook From WordPress To Another System?
Listen to an appropriate WordPress action such as wp_after_insert_post or a status-transition hook, build a versioned JSON event, sign the raw payload with an HMAC secret, and send it through WordPress’s HTTP API over HTTPS. For production reliability, store the event first and deliver it asynchronously with controlled retries instead of making publishing depend on the external system.
How Can An External System Write Data To WordPress?
For standard WordPress resources, use the WordPress REST API with appropriate authentication such as an Application Password tied to a dedicated least-privilege integration user. The external system can create or update posts, pages, media, and other supported resources. Create a custom REST route only when the business operation is not represented by an existing core endpoint.
How Do I Secure A WordPress Webhook?
Use HTTPS, a unique secret for the integration, an HMAC signature calculated from the timestamp and exact raw request body, constant-time signature comparison, timestamp validation, and unique event IDs for replay and duplicate protection. Store secrets outside public source code and rotate them when necessary.
How Do I Prevent Duplicate Or Infinite WordPress Webhook Syncs?
Give every event a unique ID and process each ID only once. Track the origin and correlation ID of changes so an update received from the custom system does not automatically echo back into an endless synchronization loop. Also define which system owns each field and use timestamps or versions to resolve conflicting updates.













Be the first to write a comment.