
The standard WooCommerce registration form is fine for basic signups, but often it does not collect everything you actually need. You might want phone numbers, company names, user preferences, or extra info that matters for your store. Adding those fields manually is possible if you know code, but most store owners do not want to touch functions.php or wrestle with hooks.
That is why Custom user registration fields for WooCommerce plugins exist. They make it easy to add extra fields without code while keeping the registration process smooth and professional. This is more than a convenience. It actually helps you gather relevant customer info early and reduces follow-up emails asking for details.
Let’s explore how to get this set up, what it can do, and why it makes a big difference for WooCommerce user registration.
Table of Contents
Why Custom Fields Matter For Registration?
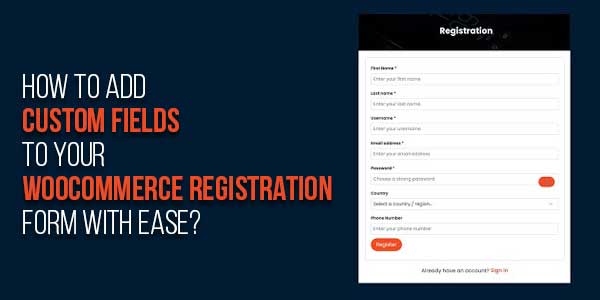
The default WooCommerce registration form asks for username, email, and password. Sometimes first name and last name. That works for basic accounts but leaves gaps for businesses that need extra details.
Imagine you run a wholesale store. You want the company name, VAT numbers, maybe a phone number, or shipping preferences. Or maybe you have a members-only service and want extra info like membership type.
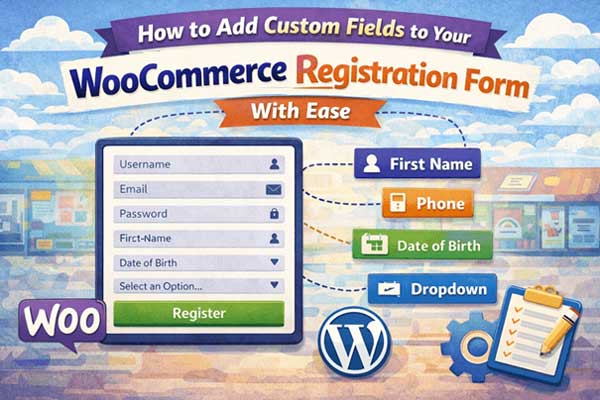
Using Custom user registration fields for WooCommerce allows you to add text fields, dropdowns, checkboxes, date pickers, and even file uploads. This is done without touching code, and you get to decide which fields are required, optional, or conditional. It is flexible enough to suit almost any type of store.
Extra fields also help with segmentation and better communication. You know who your users are before they even complete their first order. That makes targeted campaigns and personalised offers much easier.
Installing and Activating The Plugin:
Getting started is straightforward. Once you purchase or download the plugin, you install it like any other WooCommerce plugin. Upload the zip file through the WordPress dashboard plugins, and add a new upload plugin. Activate, and you are ready to go.
The interface is intuitive. You see options for creating new fields, assigning them to the registration form, and choosing their types. It is visual, so you do not need to guess what your users will see.
You can check the documentation page if needed. It has examples and step-by-step instructions that are easy to follow, even if you are new to WordPress or WooCommerce.
Adding Your First Custom Field:
Once installed, adding a field is a matter of a few clicks. Choose to add a text field or dropdown, or a checkbox. Give it a label, something the user will understand. Decide if it is required or optional.
You can even set validation rules like only numbers allowed or max characters. There is also support for conditional fields. That means you can show a field only if another field has a certain value.
For example, you could ask for company details only if the user selects that they are registering as a business. That keeps the form clean for regular customers and adds relevant fields for those who need them.
After saving the field, it appears on the registration form instantly. No coding, no editing templates, just click save, and it is live.
Organising Fields And Layout
The plugin lets you order fields however you like. You can drag and drop fields to control what appears first. You can group related fields.
Some stores prefer a single column layout, others prefer two columns. The plugin adjusts based on your theme styling. You do not have to write CSS unless you want a custom look.
It also integrates smoothly with WooCommerce registration forms without breaking other plugins or payment gateways. The form behaves like a normal registration form with extra fields included.
Viewing And Managing Submitted Data:
All the data your users submit is stored in their profile. You can view it from the admin area inside WooCommerce user accounts.
This is very useful if you need to check custom info before approving certain accounts. Some fields can be used for role assignment, like business vs regular customer. Others are just informational, like a referral source.
You can export these fields if needed for offline analysis or marketing campaigns. The plugin keeps everything structured, so no guesswork or messy data management.
Conditional Fields and Advanced Options:
Advanced options include conditional logic. You might only want some fields to appear for certain roles or based on answers to other fields. This makes registration smarter and less cluttered.
For example, if a user selects Wholesale Customer, you can show additional fields like tax ID or shipping preferences. Regular customers do not see these extra fields.
The plugin also supports different field types, including date pickers, file uploads, and checkboxes. This allows you to collect a variety of information beyond text.
Conditional fields make the form adaptive. It responds to user input dynamically. This improves user experience because the form feels relevant instead of overwhelming.
Benefits Beyond Just Data Collection
Adding Custom user registration fields for WooCommerce is not just about collecting more info. It improves communication and onboarding. You can greet users by name, show them relevant content, or assign them to correct groups.
It also saves time. Instead of contacting users later, asking for details, you have it at registration. This reduces email follow-ups and errors from manual data collection.
Well-structured registration forms make users feel considered. They see that the store cares about relevant info, and their experience is smoother.
Tips For Using Custom Fields Effectively:
Keep fields relevant and not too many. Overwhelming users with long forms can reduce registrations.
Use conditional logic wherever possible to simplify the form for different types of users. Test the form on desktop and mobile. Some fields behave differently on small screens, and you want to make sure they are easy to fill.
Regularly review submitted data. Remove fields that are not needed. Add new ones as your store evolves. The plugin makes this easy because changes are instant and do not require coding.
Conclusion:
Adding Custom user registration fields for WooCommerce transforms your registration forms from basic to functional. You can collect the information you actually need, assign roles dynamically, and improve user experience without touching a single line of code.
Combined with the WooCommerce user registration plugin logic, you have full control over what users see when signing up. You decide required fields, optional fields, and conditional displays.
It is one of those improvements that feels invisible when done right, but makes a big difference in managing users efficiently and keeping registration smooth for everyone.
 About the Author:
I’m Jeff Harrison, and I have been writing about WooCommerce for years now, mostly testing plugins like the Custom user registration fields for WooCommerce and various other ones that make online stores feel more practical. I like comparing features, pricing, and actual use cases instead of just listing stuff that sounds good. My goal is always simple: write in a way that store owners can actually understand and decide if a plugin is really worth installing.


Be the first to write a comment.