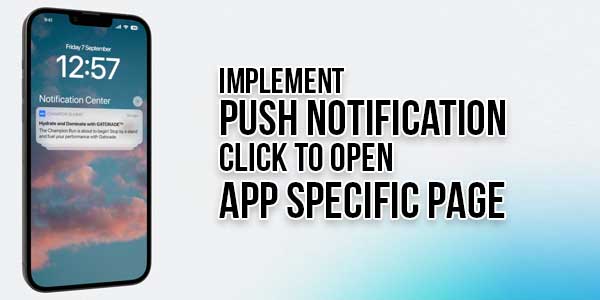
Firebase Cloud Messaging (FCM) is a powerful service provided by Google that allows developers to send push notifications to iOS, Android, and web applications. In a Flutter app, handling FCM notifications effectively can significantly enhance user engagement by directing users to relevant screens within the app upon receiving a notification. This blog post will guide you through the process of opening a specific app screen when a user clicks on an FCM notification in Flutter. We will cover the setup process, implementation details, and best practices for handling notifications.
Table of Contents
Understanding FCM and Its Benefits:
What is Firebase Cloud Messaging?
Firebase Cloud Messaging (FCM) is a cross-platform messaging solution that allows developers to reliably send messages at no cost. It enables you to notify a client app that new data is available to sync, allowing for more efficient use of network resources.
Benefits of Using FCM:
- Cross-Platform Messaging: FCM supports iOS, Android, and web platforms, allowing for a unified messaging solution across all devices.
- Targeted Notifications: FCM enables you to send notifications to specific devices or user segments, enhancing engagement and personalization.
- Rich Media Support: FCM supports rich media notifications, including images, videos, and interactive buttons.
- Analytics Integration: FCM integrates with Firebase Analytics, providing insights into user engagement and notification effectiveness.
Setting Up FCM in a Flutter Project:
Step 1: Create a Firebase Project
- Go to the Firebase Console and create a new project.
- Follow the on-screen instructions to set up your Firebase project.
Step 2: Add Firebase to Your Flutter App
For Android:
- Download the google-services.json file from the Firebase Console.
- Place the google-services.json file in the Android/app directory of your Flutter project.
- Add the Google Services plugin to your android/build.gradle file:
dependencies {
    classpath 'com.google.gms:google-services:4.3.10'
}
- Apply the Google Services plugin in your android/app/build.gradle file:
apply plugin: 'com.google.gms.google-services'
For iOS:
- Download the GoogleService-Info.plist file from the Firebase Console.
- Add the GoogleService-Info.plist file to the Runner project in Xcode.
- Add Firebase SDK dependencies to your ios/Podfile:
platform :ios, '10.0'
use_frameworks!

target 'Runner' do
  pod 'Firebase/Core'
  pod 'Firebase/Messaging'
end
- Run pod install to install the Firebase dependencies.
Step 3: Add Dependencies in pubspec.yaml
Add the following dependencies to your pubspec.yaml file:
dependencies:
  flutter:
    sdk: flutter
  firebase_core: latest_version
  firebase_messaging: latest_version
Run flutter pub get to install the dependencies.
Step 4: Initialize Firebase
Initialize Firebase in your main.dart file:
import 'package:flutter/material.dart';
import 'package:firebase_core/firebase_core.dart';
import 'package:firebase_messaging/firebase_messaging.dart';

void main() async {
  WidgetsFlutterBinding.ensureInitialized();
  await Firebase.initializeApp();
  runApp(MyApp());
}

class MyApp extends StatelessWidget {
  @override
  Widget build(BuildContext context) {
    return MaterialApp(
      title: 'FCM Demo',
      theme: ThemeData(
        primarySwatch: Colors.blue,
      ),
      home: HomeScreen(),
    );
  }
}
Implementing FCM Notification Handling:
Step 1: Request Notification Permissions
For iOS, request notification permissions from the user:
FirebaseMessaging messaging = FirebaseMessaging.instance;

NotificationSettings settings = await messaging.requestPermission(
  alert: true,
  announcement: false,
  badge: true,
  carPlay: false,
  criticalAlert: false,
  provisional: false,
  sound: true,
);

if (settings.authorizationStatus == AuthorizationStatus.authorized) {
  print('User granted permission');
} else if (settings.authorizationStatus == AuthorizationStatus.provisional) {
  print('User granted provisional permission');
} else {
  print('User declined or has not accepted permission');
}
Step 2: Configure Firebase Messaging
Configure Firebase Messaging to handle incoming messages:
FirebaseMessaging.onMessage.listen((RemoteMessage message) {
  print('Received a message while in the foreground!');
  print('Message data: ${message.data}');

  if (message.notification != null) {
    print('Message also contained a notification: ${message.notification}');
  }
});
Step 3: Handle Background Messages
To handle messages in the background, you need to define a background message handler:
Future<void> _firebaseMessagingBackgroundHandler(RemoteMessage message) async {
  await Firebase.initializeApp();
  print('Handling a background message: ${message.messageId}');
}

FirebaseMessaging.onBackgroundMessage(_firebaseMessagingBackgroundHandler);
Step 4: Open a Specific Screen on Notification Click
To open a specific screen when a notification is clicked, you need to use Firebase Messaging’s onMessageOpenedApp method:
FirebaseMessaging.onMessageOpenedApp.listen((RemoteMessage message) {
  print('Notification clicked!');
  if (message.data['screen'] != null) {
    Navigator.of(context).pushNamed(message.data['screen']);
  }
});

Sending Notifications with Screen Data:
To direct users to a specific screen, include a screen parameter in the notification payload. For example:
{
  "to": "device_token",
  "notification": {
    "title": "New Offer!",
    "body": "Check out our latest offer now."
  },
  "data": {
    "screen": "/offer"
  }
}
Best Practices for Handling Notifications:
Ensure Consistency Across Platforms:
- Platform-Specific Features: Consider platform-specific features and limitations when designing notifications. For instance, iOS and Android handle notification permissions differently.
- UI/UX Consistency: Maintain a consistent user experience across platforms to ensure a seamless user journey.
Optimize for User Engagement:
- Personalized Content: Personalize notifications to increase engagement and relevance.
- Rich Media: Utilize rich media notifications to capture users’ attention.
- Clear Call to Action: Provide a clear call to action to encourage users to interact with the notification.
Implement Analytics and A/B Testing:
- Track Engagement: Use Firebase Analytics to track notification engagement and measure effectiveness.
- A/B Testing: Conduct A/B testing to experiment with different notification strategies and optimize results.
Handle Edge Cases:
- App in Background: Ensure notifications are handled correctly when the app is in the background or closed.
- Error Handling: Implement error handling to manage scenarios where notifications cannot be delivered or processed.
Conclusion:
Integrating Firebase Cloud Messaging into your Flutter app and directing users to specific screens upon notification clicks can significantly enhance user engagement and experience. By following the steps outlined in this guide and adhering to best practices, you can create a robust notification system that effectively communicates with your users.
With the power of FCM and Flutter, you can create a seamless notification experience that keeps your users informed and engaged, ultimately contributing to the success of your app.
Developing an effective notification strategy requires careful planning and execution. By leveraging the capabilities of FCM and following best practices, you can create an engaging user experience that drives user retention and satisfaction. Start implementing these techniques today and take your app’s user engagement to the next level.


Be the first to write a comment.